| Section | |||||||||||||
|---|---|---|---|---|---|---|---|---|---|---|---|---|---|
|

...
| Command Line Installation | Composer Installation | ||||||||||||||||||||||||||||||||||||||||||||||||||||||||||||||||||||||||||||||||||||||||||||||||||||||||||||||||||||||||||||||||||||||||||||||||||||||||||||||||||||||||||||||||||||||||||||||
|---|---|---|---|---|---|---|---|---|---|---|---|---|---|---|---|---|---|---|---|---|---|---|---|---|---|---|---|---|---|---|---|---|---|---|---|---|---|---|---|---|---|---|---|---|---|---|---|---|---|---|---|---|---|---|---|---|---|---|---|---|---|---|---|---|---|---|---|---|---|---|---|---|---|---|---|---|---|---|---|---|---|---|---|---|---|---|---|---|---|---|---|---|---|---|---|---|---|---|---|---|---|---|---|---|---|---|---|---|---|---|---|---|---|---|---|---|---|---|---|---|---|---|---|---|---|---|---|---|---|---|---|---|---|---|---|---|---|---|---|---|---|---|---|---|---|---|---|---|---|---|---|---|---|---|---|---|---|---|---|---|---|---|---|---|---|---|---|---|---|---|---|---|---|---|---|---|---|---|---|---|---|---|---|---|---|---|---|---|---|---|---|
|
|
.png?version=1&modificationDate=1618298359916&cacheVersion=1&api=v2&width=450)
Introducing Magento 2 Minifier
| Section |
|---|
The Minifier extension makes working in an online store as easy as possible by offering the following options:
|
General Information
| Section | ||
|---|---|---|
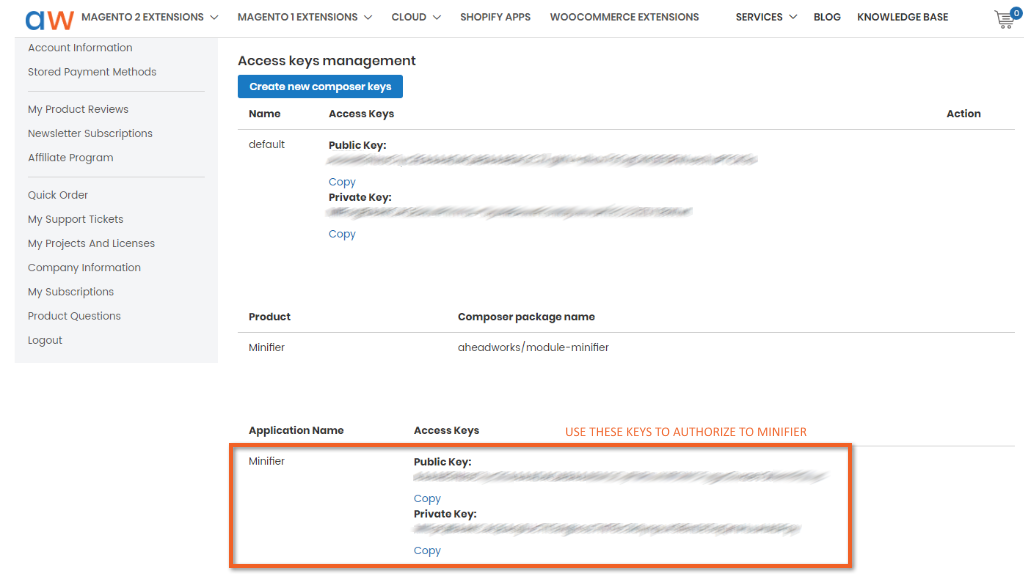
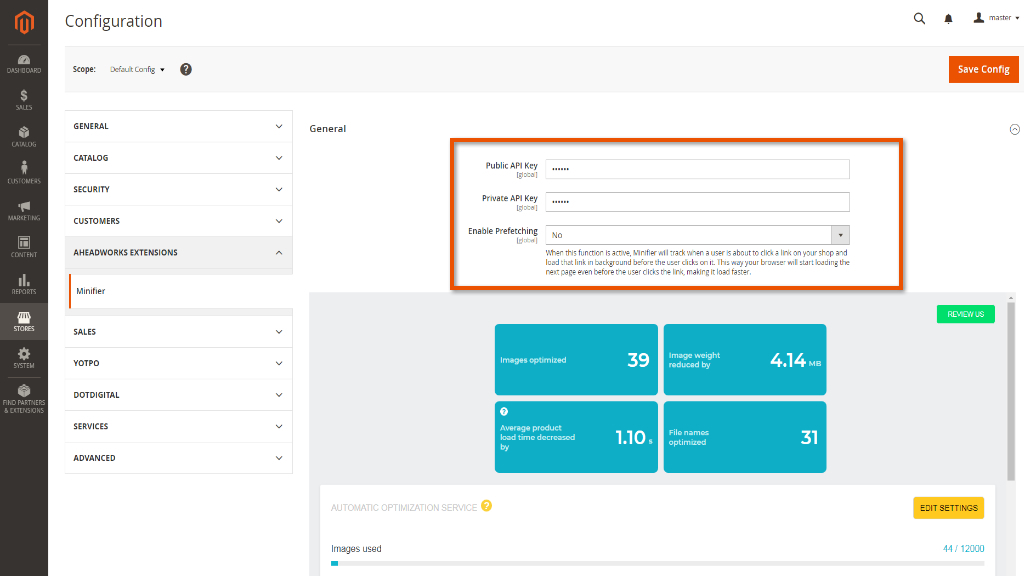
Authorizing to BuildifyBefore starting to work with the extension you need to enter the authorization keys by going to Stores → Configuration → Aheadworks Extensions → Minifier. Two keys are required: Public and Private API.
Enable prefetchingTo enable prefetching in Minifier, set Enable to Yes. By default, this option is set to No. Minifier will track when a user is about to click on a link on your shop and load that link in the background.
|
...
| Section | |||||||||
|---|---|---|---|---|---|---|---|---|---|
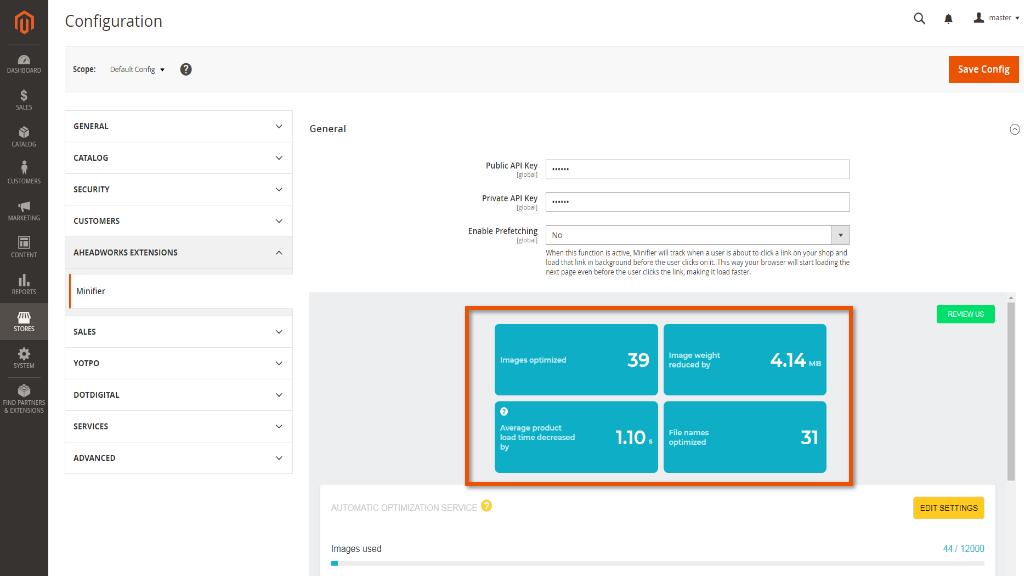
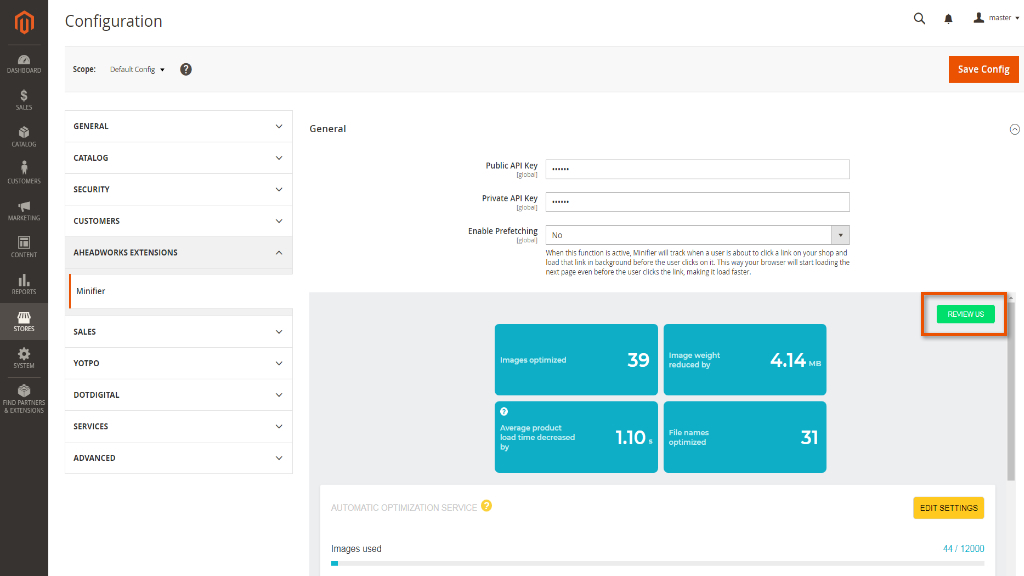
The dashboard has four areas:
Clicking on the Review us button you will be automatically redirected to the Minifier product page on Shopify app store.
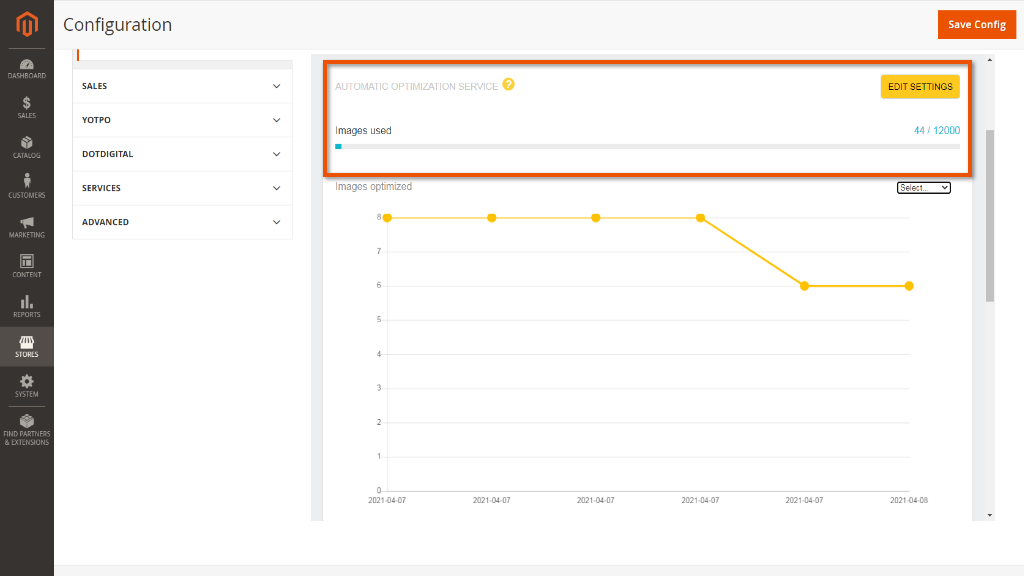
Settings ConfigurationThe Automatic optimization service tab provides information about the number of already optimized images. For changing optimization configurations click on Edit setting.
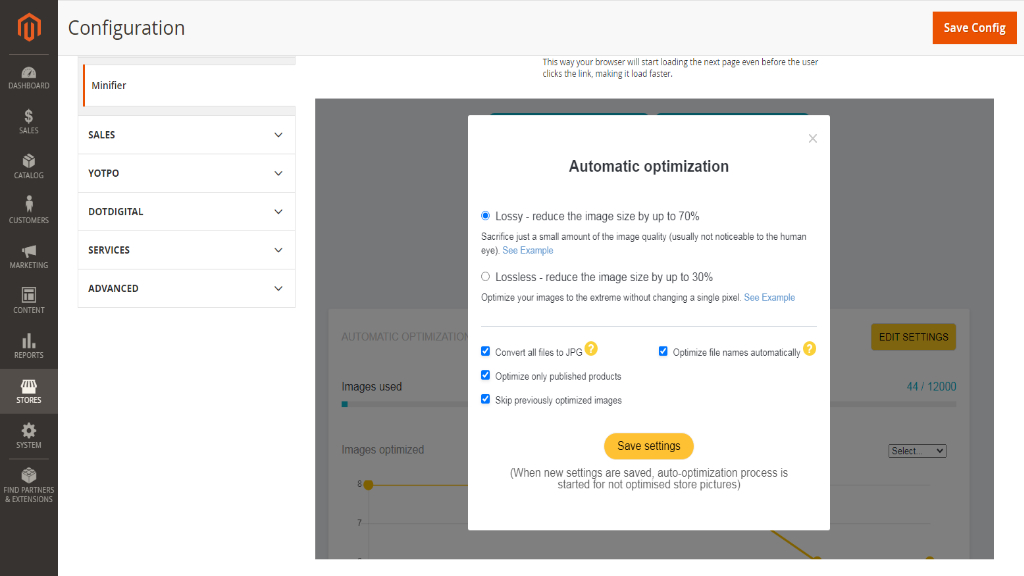
The settings area allows to configure the following:
After clicking on the Save settings button new settings will be saved and will be used in the future for the auto-optimization process for not optimized store pictures.
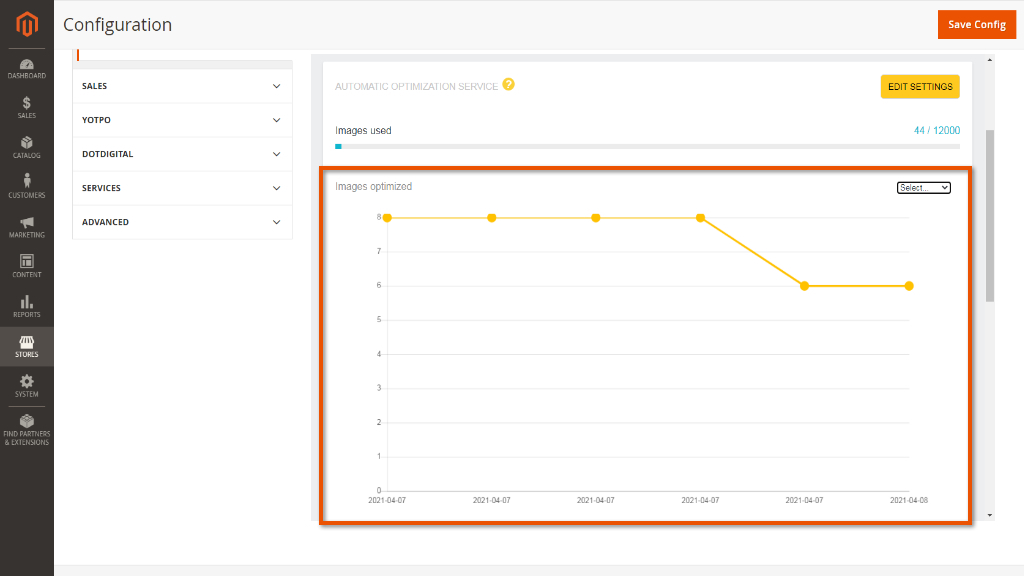
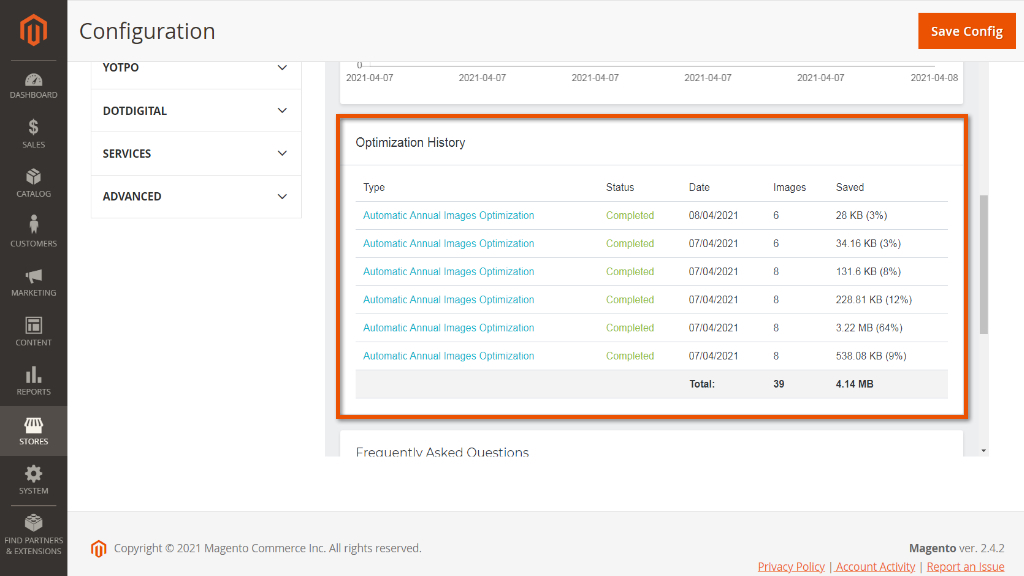
Optimization performanceThe images optimized graph introduces the information on the extension usage. Choose the needed period to check the number of optimized images during it.
The Optimization History area contains the following columns:
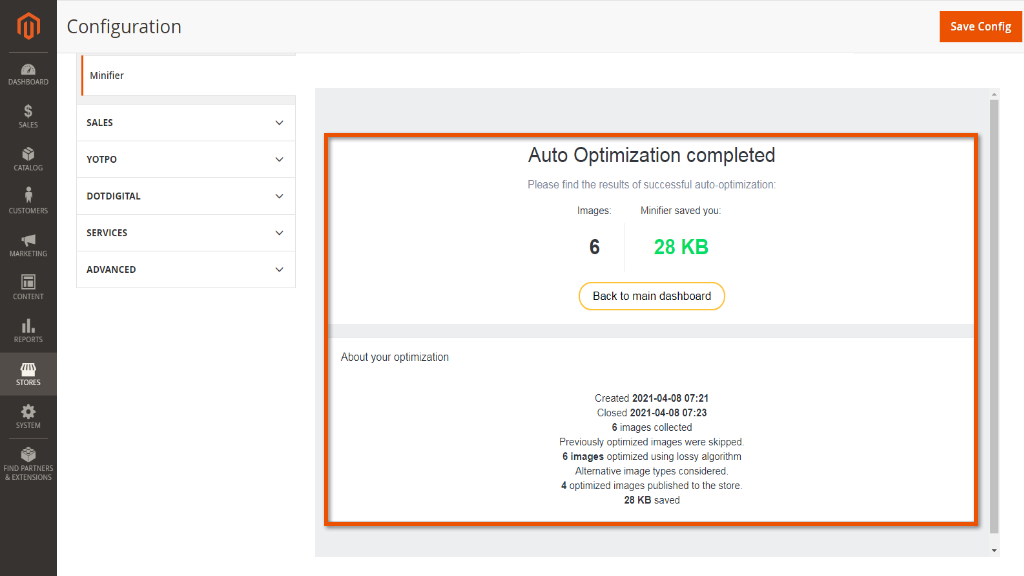
To view the report on optimization click on the link. The report describes the detailed information on:
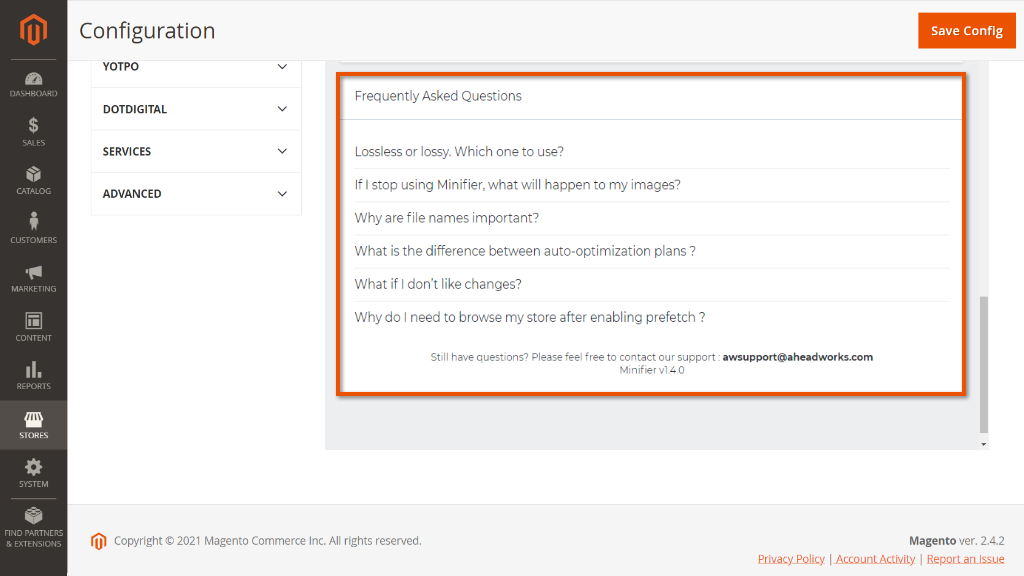
Knowledge BaseThe Frequently Asked Questions area introduces answers for most asked questions about the working process in Minifier.
|
...