...
| width | 50% |
|---|
| Table of Contents |
|---|
| Warning |
|---|
Firefox user notice: Please use another web browser to view this document. Sorry for the inconvenience. |
...
...
...
Magento 2 Product Downloads is a module to allow uploading files to a Magento 2 store and attaching them to products. These files are available for downloading on the Storefront product pages.
Compatibility: Magento Open Source 2.3.X - 2.4.X, Magento Commerce 2.3.X - 2.4.X
Thank you for choosing Aheadworks!
Installing M2 Product Downloads
...
| Panel | ||||
|---|---|---|---|---|
| ||||
1. Backup your web directory and store database |
| Panel | ||||
|---|---|---|---|---|
| ||||
2. Download the Product Downloads installation package |
| Panel | ||||
|---|---|---|---|---|
| ||||
3. Upload contents of the Product Downloads installation package to your store root directory |
...
| borderWidth | 2px |
|---|---|
| borderStyle | solid |
4. In SSH console of your server navigate to your store root folder:
| No Format |
|---|
cd path_to_the_store_root_folder |
run:
| No Format |
|---|
php -f bin/magento module:enable Aheadworks_ProductDownloads |
then:
| No Format |
|---|
php -f bin/magento setup:upgrade |
after:
| No Format |
|---|
php -f bin/magento setup:static-content:deploy |
| Panel | ||||
|---|---|---|---|---|
| ||||
5. Flush store cache; log out from the backend and log in again |
| Note |
|---|
Make sure the installation is done from the FTP administrator account. Otherwise, set 775 permissions to the store root directory after the extension is deployed. |
...
| width | 50% |
|---|
...
| borderWidth | 2px |
|---|---|
| borderStyle | solid |
If you are installing an extension from Aheadworks for the first time, you need to add our composer repository to your Magento store:
| Panel | ||||||||||||||
|---|---|---|---|---|---|---|---|---|---|---|---|---|---|---|
| ||||||||||||||
1. Login to your ssh console and navigate to your store folder:
Run the following command:
On successful execution of the command you will be able to use the composer to install the extensions. |
...
| borderWidth | 2px |
|---|---|
| borderStyle | solid |
To install the extension:
2. Login to your ssh console and navigate to your store folder:
| Panel | ||||
|---|---|---|---|---|
| ||||
| cd path_to_the_store_root_folder |
...
| borderWidth | 2px |
|---|---|
| borderStyle | solid |
3. Run the following command to install the latest version of the extension:
| Panel | ||||
|---|---|---|---|---|
| ||||
composer require aheadworks/module-product-downloads |
if you need to install a specific version, run this command:
| Panel | ||||
|---|---|---|---|---|
| ||||
composer require aheadworks/module-product-downloads:<version> |
| Tip |
|---|
Specify the version of the extension in <version> |
| Panel | ||||
|---|---|---|---|---|
| ||||
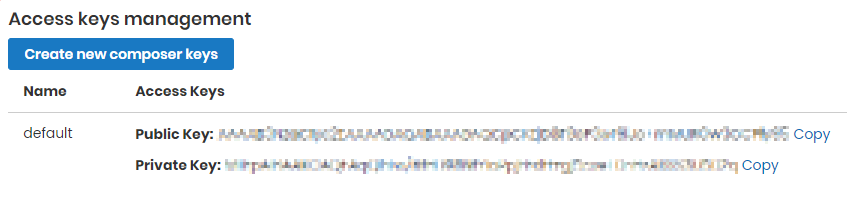
When prompted, enter Public Key (Username) and Private Key (Password): |

| Note |
|---|
Both Public Key (Username) and Private Key (Password) can be found in My Projects and Licenses in your personal account on our site:
|
| Panel | |||||||||||||||||||||||||||||||||||
|---|---|---|---|---|---|---|---|---|---|---|---|---|---|---|---|---|---|---|---|---|---|---|---|---|---|---|---|---|---|---|---|---|---|---|---|
| |||||||||||||||||||||||||||||||||||
4. Enable the extension:
Next, register the extension:
Recompile your Magento store if you are in the Production mode:
To verify that the extension is enabled, run this command:
Clean store cache, by running the following command:
Log out and Log in the backend again. |
...
| borderWidth | 2px |
|---|---|
| borderStyle | solid |
To upgrade the extension:
5. To update or upgrade an extension:
Download the updated extension file. Take note of the module-name and version. Export the contents to your Magento root.
If a composer package exists for the extension, run one of the following.
| Code Block | ||
|---|---|---|
| ||
composer update aheadworks/module-product-downloads |
| Code Block | ||
|---|---|---|
| ||
composer require aheadworks/module-product-downloads:<version> |
Run the following commands to upgrade, deploy, and clean the cache.
| Panel | ||||
|---|---|---|---|---|
| ||||
php bin/magento setup:upgrade
php bin/magento setup:static-content:deploy
php bin/magento cache:clean |
Set-up Cron
...
| width | 100% |
|---|
Skip this step if you have already configured cron or if you are familiar with the job. Otherwise, read the following instructions on setting cron on your Magento store: Magento user guide.
Generally, it is enough to run the following command in the SSH console:
| Code Block | ||
|---|---|---|
| ||
crontab -e |
And insert the following lines:
| Code Block |
|---|
*/3 * * * * php -c <ini-file-path> <your Magento install dir>/bin/magento cron:run
*/3 * * * * php -c <ini-file-path> <your Magento install dir>/update/cron.php
*/3 * * * * php -c <ini-file-path> <your Magento install dir>/bin/magento setup:cron:run |
Confirm the Save request before exit.
Introducing M2 Product Downloads
...
Product Downloads for Magento 2 is a module to upload files to products and let customers download them.
Features and Highlights:
- Uploading files of various types
- Importing/exporting files in bulk
- Associating a file with multiple products
- Attaching any number of files to a product
- Making use of the pre-arranged icon package
- Viewing the number of downloads of each file
| Warning |
|---|
SVG files are not supported by the current version of the extension. Reason: Magento 2 does not validate SVG files. |
Business value
Product Downloads for Magento 2 helps support your products with detailed specifications, instructions on use, video tutorials, samples, templates, demos and other attachment files - easily accessible and downloadable from the product pages on the Storefront. By offering free downloadable materials with the help of Product Downloads you can inform customers well on the worth and quality of products, increase customer trust as well as store traffic.
Configuring M2 Product Downloads
...
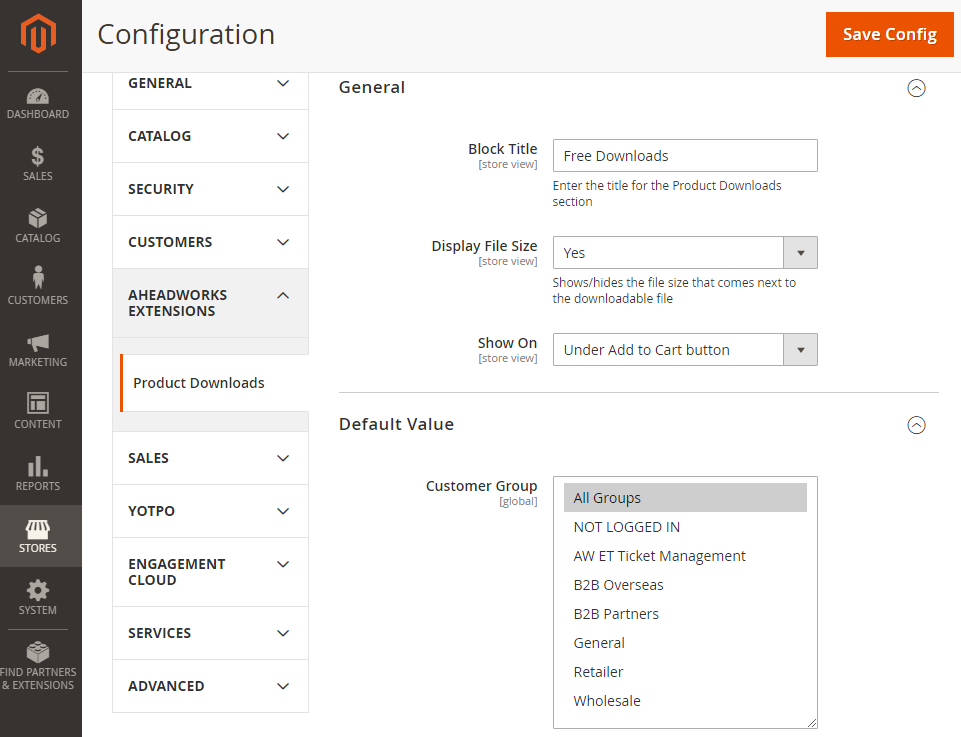
To configure the extension, proceed to Stores > Aheadworks Extensions > Product Downloads.
The extension configuration page comes in three sections: General, Default Value and Manage Icon.
The General section defines how the files will look like on the Storefront. The following configuration options are available herein:
- Block Title - the text-field to contain the title for the Product Downloads block;
- Display File Size - the Yes/No selector to show/hide the size of the file next to its name;
- Show on - the drop-box to define the location for the display of the Product Downloads block: Side Bar, Under Add to Cart Button, Product Tab
| Note |
|---|
If your Magento 2 theme does not presume a side-bar on product pages, you will not be able to see the Product Downloads block on the Storefront. |
The Default Value section defines who will see the files on the Storefront. There is one configuration option herein:
- Customer Group - the selector of customer groups to be eligible to see the files (multiple selection is possible);
The Manage Icon section enlists the images which are used to visually identify the types of the files on both back- and front-end. The section shows a table of the following columns:
- File Type - the text-field to identify the type of the file;
- Icon - the Choose File button to upload an image file for the given type;
- Action - the bucket icon to delete the row.
To add a new row to the table and specify the data for the new file type, click on the Add New button below the table.
| Info |
|---|
Icons, indicated herein, are automatically assigned to the product attachment files when the latter are uploaded to the store. This is done in compliance with the types of the files as indicated in the table herein. |
The extension comes with a prearranged list of icons and file-types: csv, doc, jpg, mp3, mp4, pdf, png. The Admin is always able to change either the file type assigned to the icon, or the icon linked to the file-type.
![]()
On Back-end
| Section | ||||
|---|---|---|---|---|
Monitoring FilesTo view the product attachment files uploaded to your Magento 2 store, go to Catalog > Product Downloads by Aheadworks > Files. The page suggests the Files Grid, Add New Attachment and Synchronize Attachments buttons. The Files Grid aggregates the details about all uploaded to the system product attachment files. The grid has the following columns:
The grid is sortable and supports pagination.
Adding FilesThere are four ways of adding product attachment files to the system:
Add Files to FTPUpload files to media/aw_pd/files. When files are uploaded onto the ftp-server, they will automatically get represented in the Files grid. This requires re-indexing the database, which can be done in two ways:
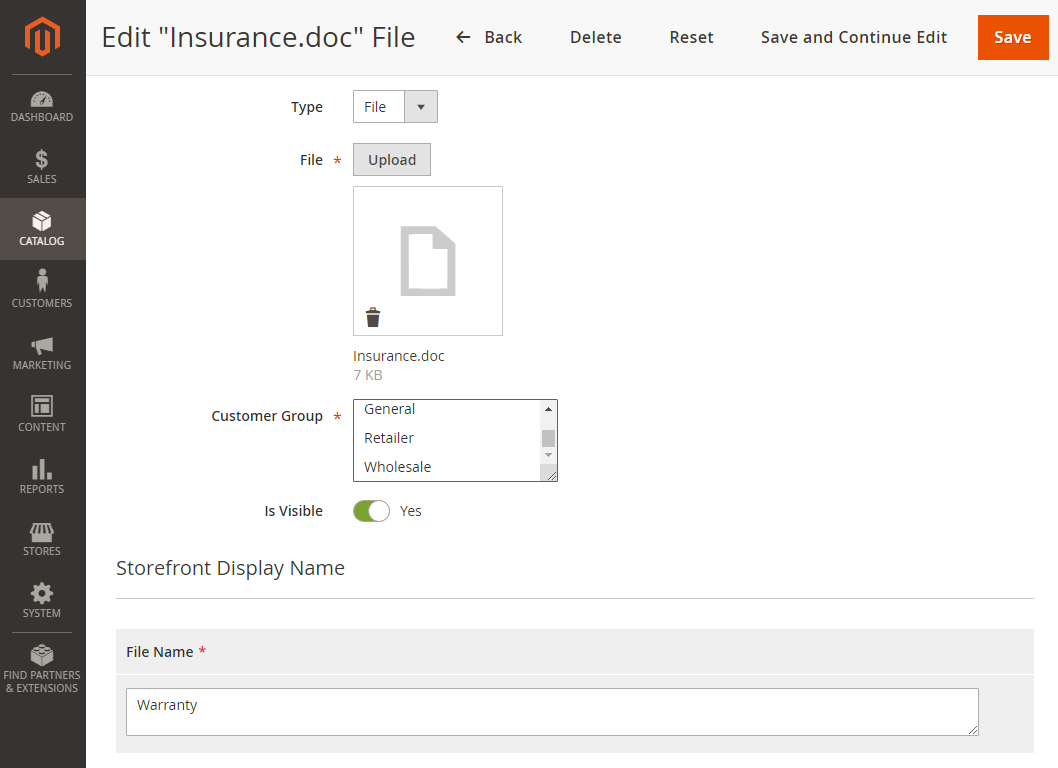
Add Files to Files GridTo add files one-by-one to the Files grid, go to Catalog > Product Downloads by Aheadworks and click on the Add New Attachment button. The New File page will get loaded, similar to that of Edit [Name] File. The New/Edit File page has the following parameters for configuration:
Click Save in the top right when finished to save the configuration of the file and add it to the Files grid.
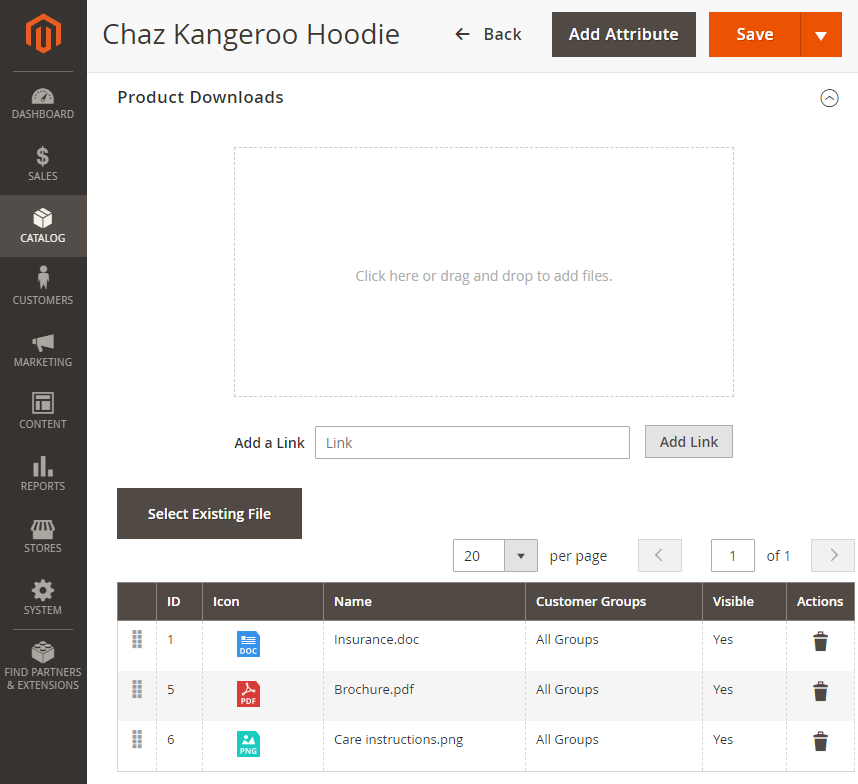
Attach Files to ProductsTo attach files to a product, proceed to Catalog > Inventory > Products and select a product for editing. When the Product page is loaded, scroll down to the Product Downloads section. The Product Downloads section allows attaching multiple files to the product. The Admin can attach either existing files or upload new ones. The section delivers the functionality to attach files and to browse the files which have already been associated with the product. The latter is done with the grid located at the bottom of the section. The grid with the attached files has the following columns:
The grid supports pagination and allows re-arranging the order of the rows. The latter is needed to set the order of the files on the Storefront. To re-arrange the order of the rows, make use of the icon next to the ID of the file. Push on the icon, and drag-and-drop the row to the new position. The grid will get populated as files are being attached to the product.
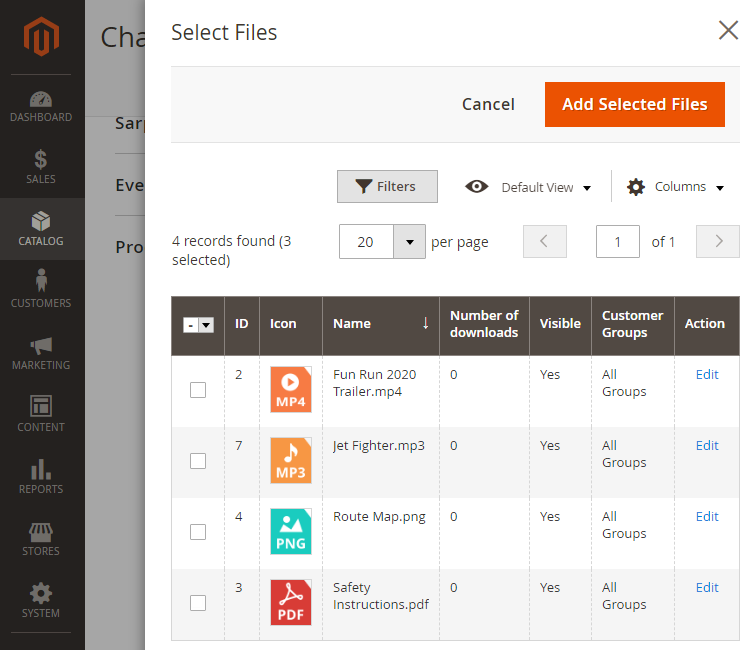
To attach files which have already been uploaded to the system, click on the Select Existing File button. The Select Files popover will emerge. The popover fetches the Files grid with check-boxes next to each row. Tick the check-boxes which correspond to the chosen files and click on the Add Selected Files button below the grid. The popover will get closed, the files will be added to the product, and the Product Downloads sections on the Product page will get updated.
To attach files which have not yet been added to the system, make use either of the "Click here or drag-and-drop files" area or the Add a Link text-field. Files attached to a product this way, will automatically populate the Files grid and will receive default values for the following parameters:
You can add multiple files in one go with the help of the 'Click here or drag-and-drop files", but only one file at a time with the help of Add a Link. To do so, insert a link into the Add a Link text-field and click on the Add Link button. Import/Export FilesTo import product attachment files to the system, go to System > Data Transfer > Import and perform the operations as described in the official Magento 2 user-guide. |

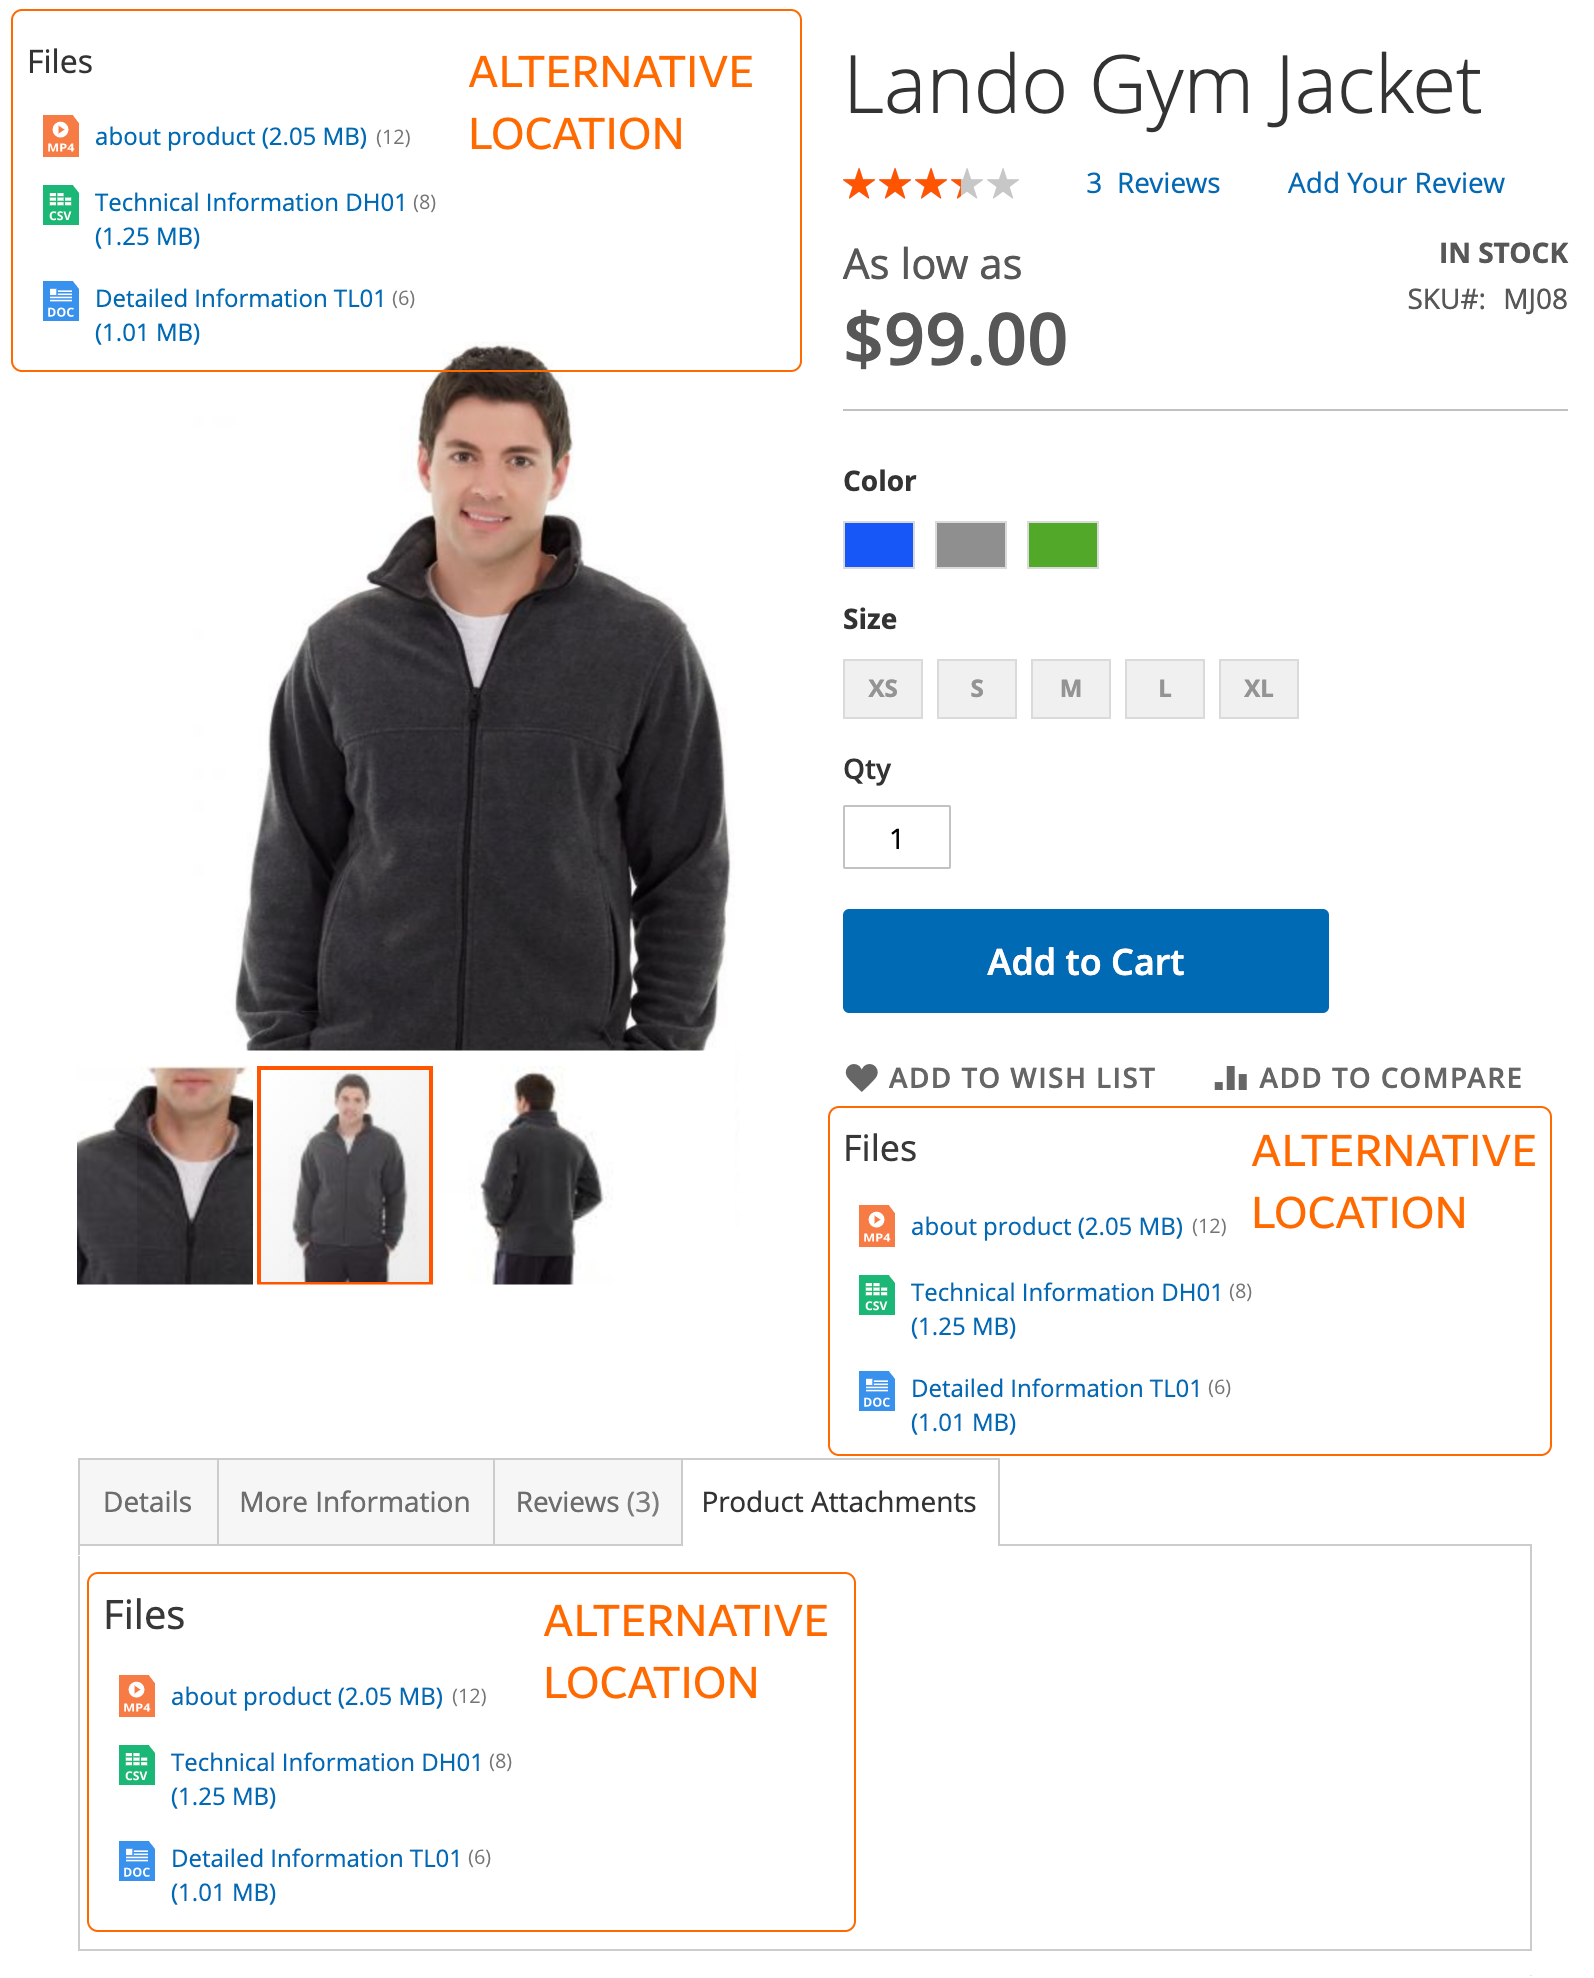
On Front-end
| Section |
|---|
When on the Storefront, customers are able to see product attachment files on product pages in one of the three alternative locations (as set in the Extension Configuration) under the block-title and in the order as set on backend. To download a file, customers click on the name of the file.
|
Uninstalling M2 Product Downloads
...
| width | 50% |
|---|
Manual Removal
...
1. Disable the module by executing the following commands:
| No Format |
|---|
php bin/magento module:disable Aheadworks_ProductDownloads
php bin/magento setup:upgrade |
...
2. Remove the extension files from the following folder:
| No Format |
|---|
app/code/Aheadworks/ProductDownloads |
...
| width | 50% |
|---|
Automatic Removal (via Composer)
...
1. Disable the module by executing the following commands:
| No Format |
|---|
php bin/magento module:uninstall Aheadworks_ProductDownloads |
...
| Warning |
|---|
For more information follow the product user manual on our website |
Thank you for choosing Aheadworks!
Need Customization?
.png?version=1&modificationDate=1583747935724&cacheVersion=1&api=v2)
You can always find the latest version of the software, full documentation, demos, screenshots, and reviews on http://aheadworks.com
License agreement: https://aheadworks.com/end-user-license-agreement
Contact Us: https://aheadworks.com/contact
Copyright © 2021 Aheadworks Co. http://www.aheadworks.com