| Section | |||||||||||||
|---|---|---|---|---|---|---|---|---|---|---|---|---|---|
|

...
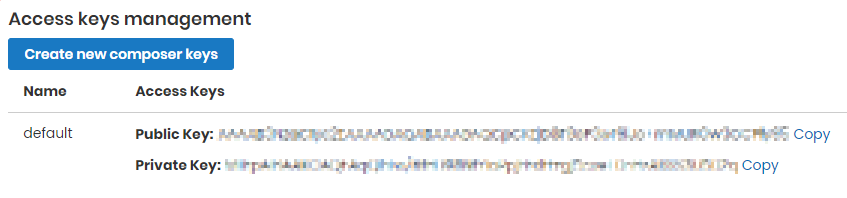
| Command Line Installation | Composer Installation | ||||||||||||||||||||||||||||||||||||||||||||||||||||||||||||||||||||||||||||||||||||||||||||||||||||||||||||||||||||||||||||||||||||||||||||||||||||||||||||||||||||||||||||||||||||||||||||||
|---|---|---|---|---|---|---|---|---|---|---|---|---|---|---|---|---|---|---|---|---|---|---|---|---|---|---|---|---|---|---|---|---|---|---|---|---|---|---|---|---|---|---|---|---|---|---|---|---|---|---|---|---|---|---|---|---|---|---|---|---|---|---|---|---|---|---|---|---|---|---|---|---|---|---|---|---|---|---|---|---|---|---|---|---|---|---|---|---|---|---|---|---|---|---|---|---|---|---|---|---|---|---|---|---|---|---|---|---|---|---|---|---|---|---|---|---|---|---|---|---|---|---|---|---|---|---|---|---|---|---|---|---|---|---|---|---|---|---|---|---|---|---|---|---|---|---|---|---|---|---|---|---|---|---|---|---|---|---|---|---|---|---|---|---|---|---|---|---|---|---|---|---|---|---|---|---|---|---|---|---|---|---|---|---|---|---|---|---|---|---|---|
|
|
.png?version=1&modificationDate=1613403190029&cacheVersion=1&api=v2&width=450)
Updating to a New Version
...
| Section | ||||||||||||
|---|---|---|---|---|---|---|---|---|---|---|---|---|
|
Introducing Advanced Reports
| Section |
|---|
Available ReportsTo help reflect on the performance of a store Magento 2 Advanced Reports suggests 12 reports, 4 general and 8 detailed. General Reports
Detailed Reports
Key-FeaturesAdvanced Reports is totally a backend module. The module facilitates store admins with comprehensive statistics on various aspects of their store performance. Each aspect is reflected upon in a report. The reports are accessible from either the menu or dashboard. The dashboard furthermore allows for comparison and contrast of data with regard to the given time period. The period is set with the help of the advanced calendar. The extension allows configuring reports both in bulk and individually. Configuration includes settings for scheduled emailing of reports or their parts. Emailing could be done to multiple addresses. What's New?The present version of the extension (2.8.0) extends the number of performance indices within the Sales Detailed report to 45, including those of shipping and billing. Furthermore, the calendar now features the Latest Quarter parameter. On top of everything, scheduled emailing was added as a key-feature. |
Using Advanced Reports
| Section | ||||||||||||||
|---|---|---|---|---|---|---|---|---|---|---|---|---|---|---|
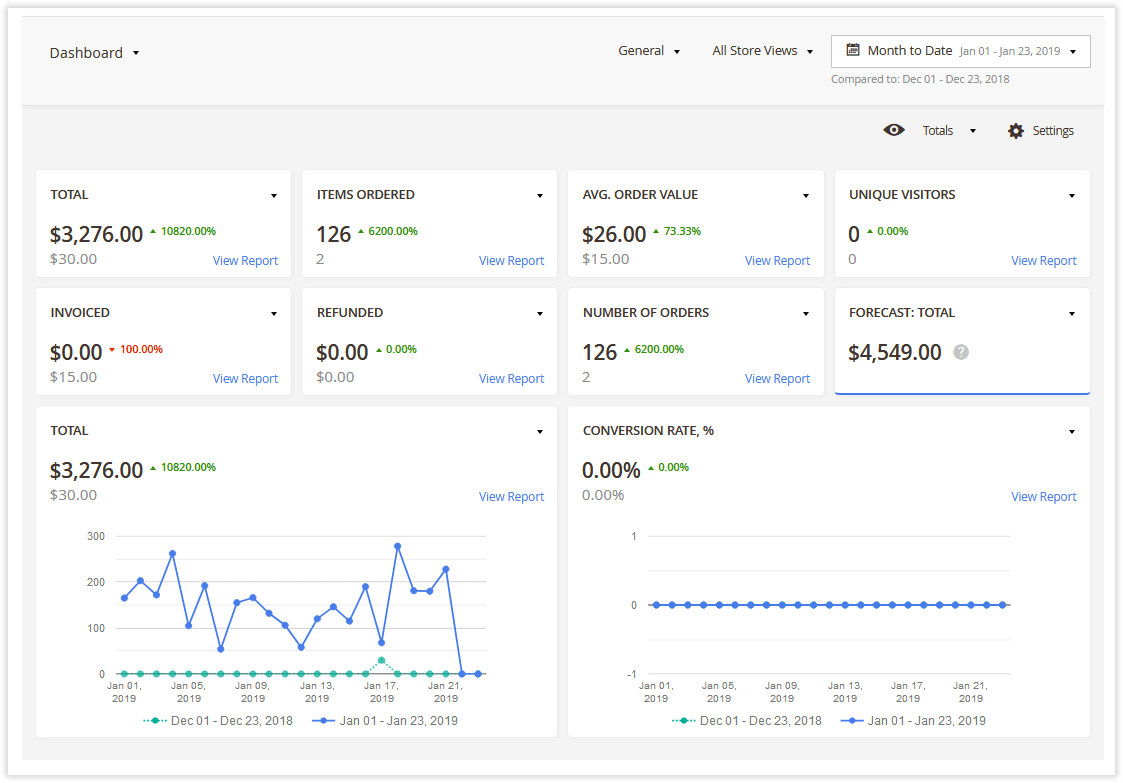
Report DashboardDashboard LayoutThe dashboard shows 10 configurable widgets to reflect on the overall performance of the store.
The widgets come as 8 numeric and 2 chart ones. Each widget has the following elements:
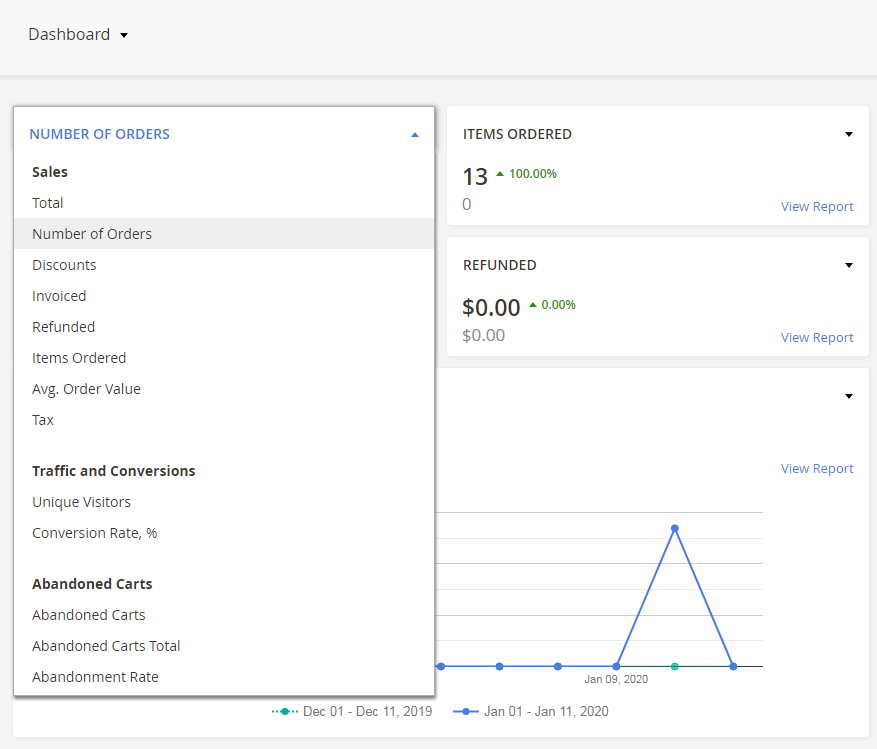
In addition to the above, the chart widgets will show relevant trends (for example, conversion rate by time period) and legends telling the time periods in comparison. Hovering the cursor over the trend milestones will show a popup telling the value of the X time-line in that point of time (day, month or other augment). Finally, the dashboard has a set of filters (see top of the page). You can track the performance of a selected customer group and/or store view. Changing widget contentThe module enables changing the content of the widgets. To do so, click on the name of the widget. A folding list will appear showing three categories of indices available for display. The indices and categories are as follows in the table below.
On choice of an index the widget will update its data. The content of the widgets is saved automatically, so you will not need to configure the widgets every time you enter the dashboard page.
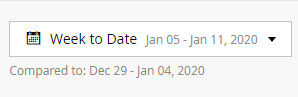
Setting Comparison PeriodThe dashboard presents data in comparison and contrast. To set the periods for statistical comparison refer to the Comparison Period Block in the top right.
The block comes as a dropbox with the following options:
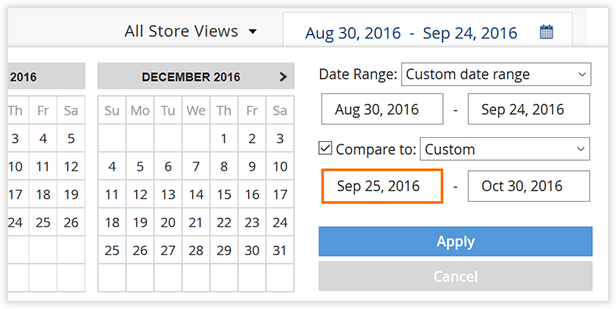
On choice of the current period the period for comparison will be set automatically one step back. For example, Today will be compared to Yesterday, Yesterday to the day before, and so on. Advanced Reports also allows for setting custom periods for comparison. This feature is only available in the Calendar, which in turn is only available on the pages of the reports, not on the Dashboard page. The Calendar features an additional option the list of options for comparison above - "Custom Date Range". On enabling this option, either type-in the dates in the date fields, or select the dates on the calendar tables to the left. To set a custom comparison period, activate the checkbox next to the "Compare to" feature and select 'Custom' in the drop list. The date range fields will then become active. Type-in the dates in the comparison date fields, or select the dates on the calendar tables to the left.
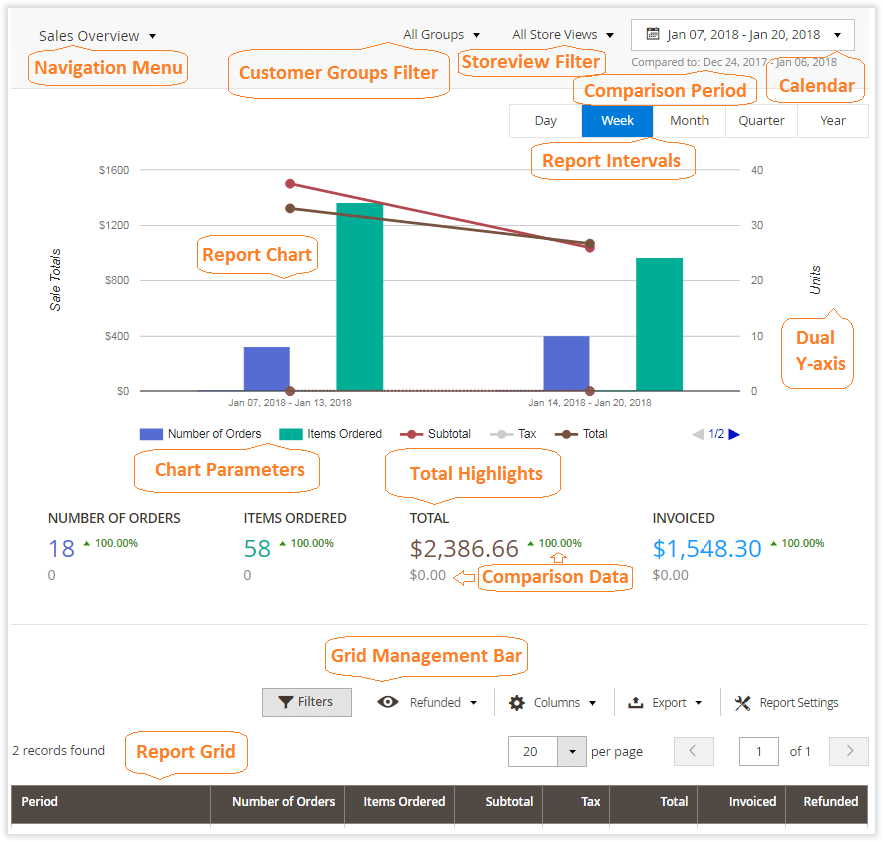
The choice of the time period will be saved automatically on page reload or when surfing to another page. Performance ReportsReport LayoutTo get access to the reports go to Reports > Advanced Reports by Aheadworks. Alternatively, should you find yourself on the Dashboard page click the View Report active link on the widget (see Dashboard Layout above). Finally, you may employ the Navigation menu. Generally, each report page has the following elements:
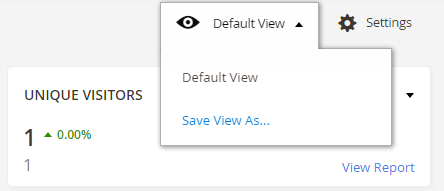
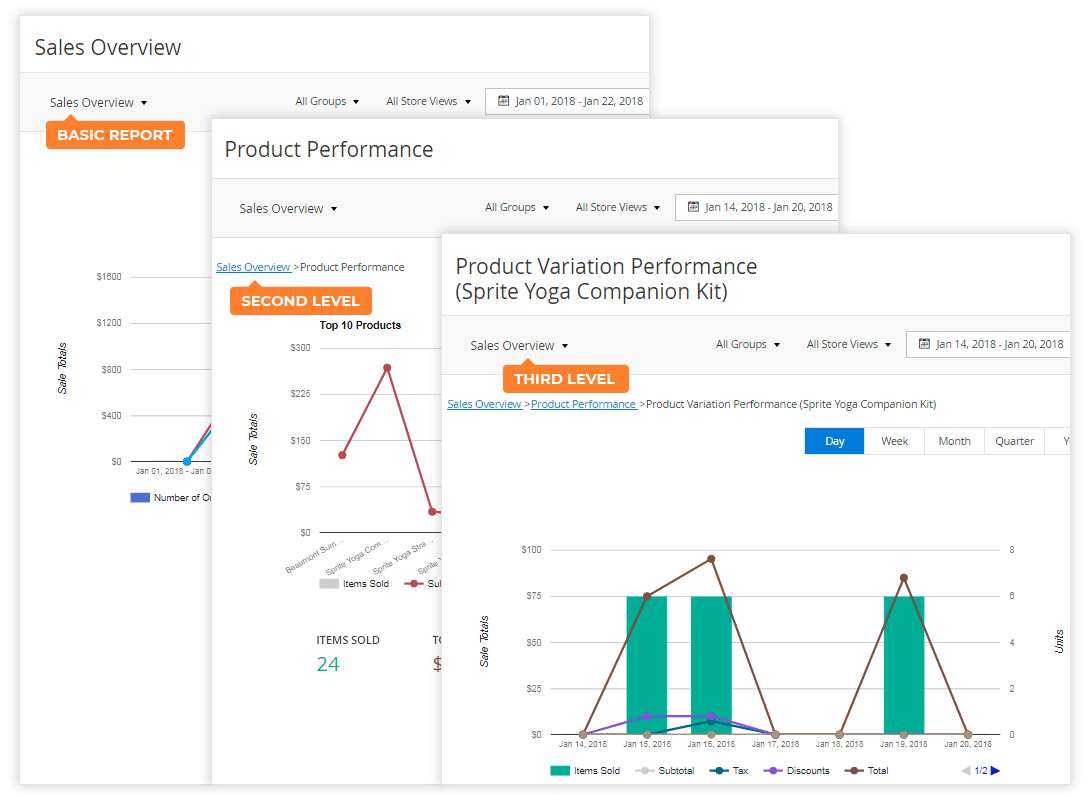
For more convenience, the generated reports can be later exported to *.csv or *.xml tables with the help of the 'Export' button above the report grid. Generating a ReportThe extension comes with 12 reports each covering a specific aspect of performance of the store. To generate a report, take the following steps: Step 1 - Select the required report from the list (go to Reports > Advanced Reports by Aheadworks). Step 2 - Use the calendar to select the required report date range and click the 'Apply' button. Step 3 - The report is generated. Now, you can adjust the period for reporting and data grouping to get the required presentation. Adjust filters if necessary. Step 4 - Once the required filters are selected, save the current view by expanding the 'Default View' box and clicking Save view as. The saved view will be available on all Advanced Reports pages. It can be recalled anytime you make changes to the filters or the report grid. Report Drill-downAll reports are interconnected. It means that you can consecutively get a deeper picture of the report subject matter. Taking the 'Sales Overview' report as a starting point, you can navigate to a 'Product Performance' report by clicking on an entry in the report grid. Next, clicking on the entry in the 'Product Performance' report will take you to an 'Individual Product Performance' report page.
You can use the breadcrumb trail above each report chart to navigate the sequence of reports. The available drill-down scenarios are as follows:
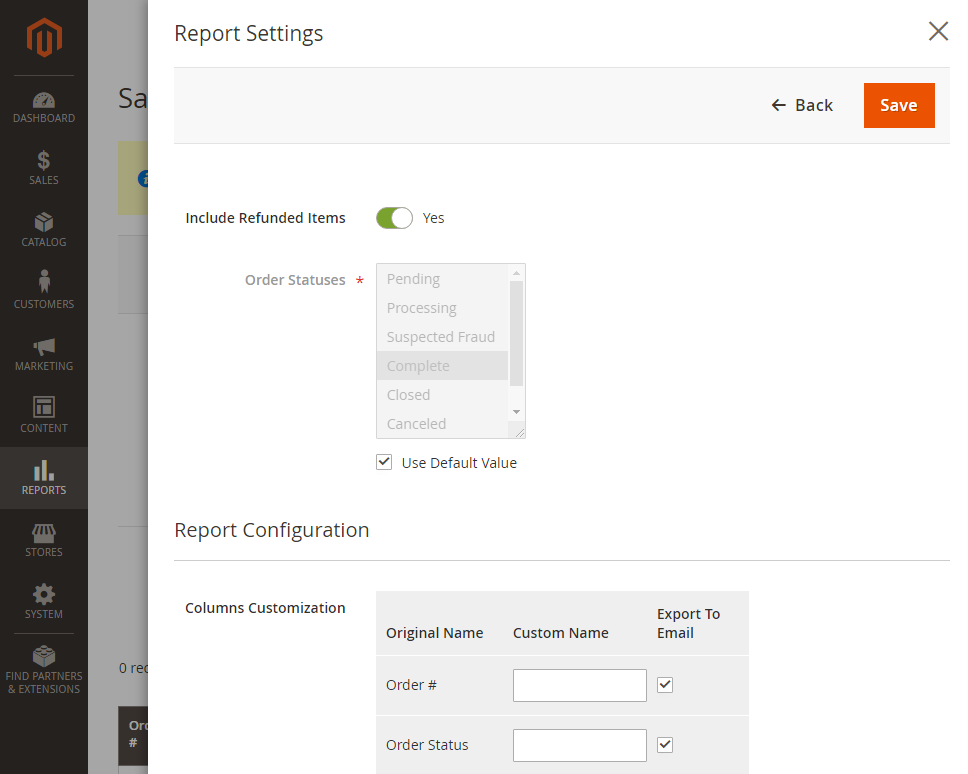
Configuring ReportsTo configure the report, click on the Report Settings option in the Grid Management Bar.
A popover will appear, suggesting two blocks for customization: Order Statuses and Report Configuration. The former comes as a list of order statuses available for selection. Only orders of selected herein statuses will be the sources of data for the given report. By default the list is disabled, the values set for all reports on the Extension Settings page are used. Disable the checkbox next to the 'Use Default Value' to customize the list of statuses. The Report Configuration block allows for columns customization. You can substitute the default names of the report columns with your text, and also to decide whether data in these columns are to be exported to emails (see the checkbox next to the column name).
|
Extension Settings
| Section | ||
|---|---|---|
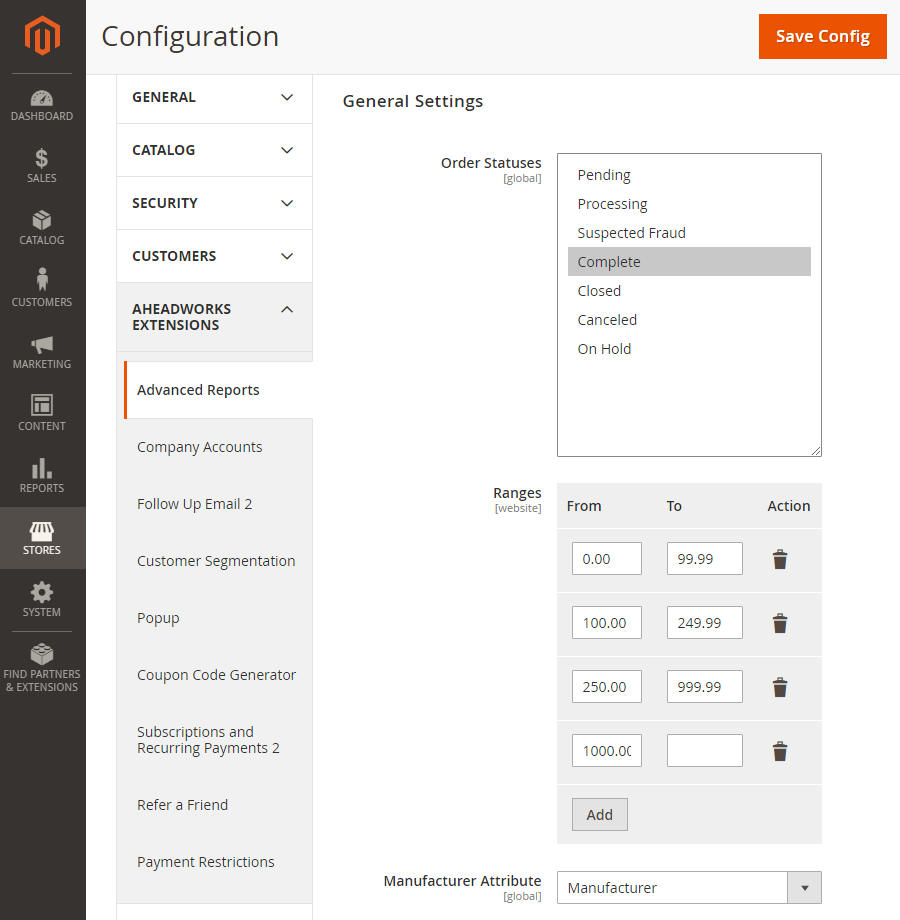
The general settings of the extension can be accessed from Stores > Configuration > AHEADWORKS EXTENSIONS > Advanced Reports. The Settings page comes in two blocks: General Settings and Scheduled Email Reports. General SettingsThe General Settings block allows tweaking Order Statuses, Ranges, and Manufacturer Attribute.
If required, you can select multiple order statuses using either of the two hot-keys: Specifying order statuses herein will extend the selection over all the reports. See Configuring Reports above for individual configuration of reports.
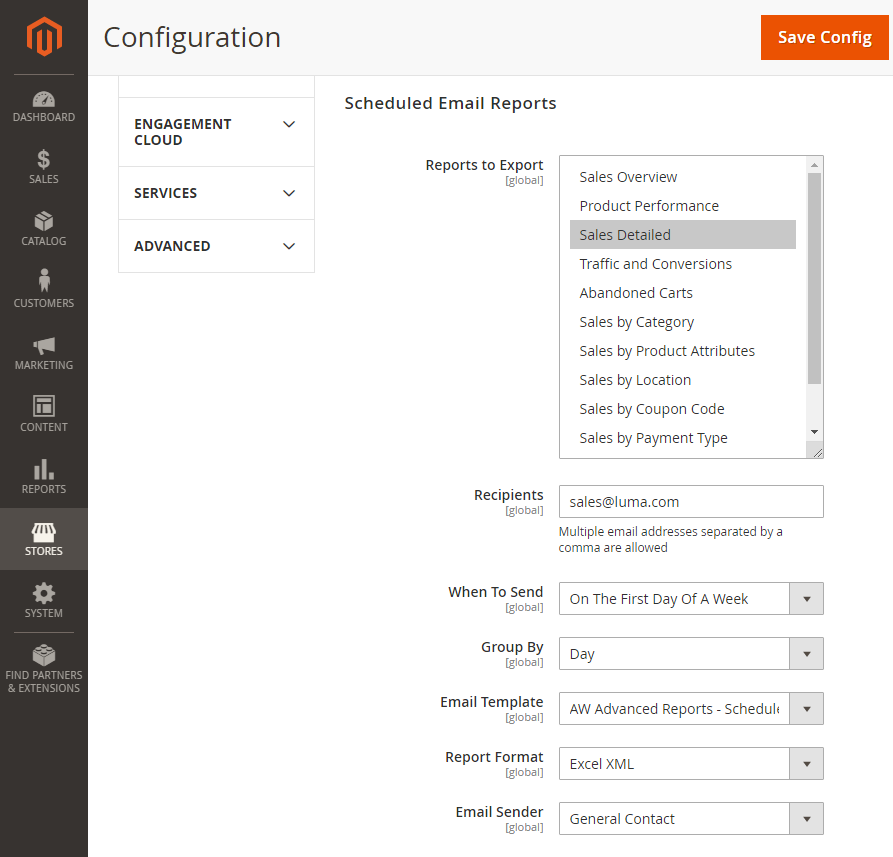
Once done, click Save Config in the top right of the page, or proceed to the next step. Scheduled EmailingAs of version 2.8.0 Advanced Reports allows scheduling emails containing reports. It is possible to send full reports or parts of thereof. Furthermore, the extension supports multi-address mailing.
The Scheduled Email Reports block of the Settings page contains the following configuration options:
Once done, click Save Config in the top right of the page. |

Report Indexes
| Section | ||
|---|---|---|
Starting from version 2.0.0, the extension introduces report indexes which facilitate faster data load, a period for reporting specified. Report indexing eliminates the need for report generation on demand. Basically, the reports are generated once a day (or more frequently depending on the cron settings). Post-generated results are loaded when you open a report. Report indexing is particularly useful for busy stores processing large numbers of orders. For example, it should not take more than a couple of minutes to reindex ~200k orders on a decent server hardware. Considerable lags on reports generation may occur otherwise. How to index reports?As it was mentioned above, the reports are indexed automatically depending on your store cron setup. By default, cron runs once a day, meaning that the data reported will always be up-to-date. You can always run reindexing manually, however, it involves console usage. Follow the link to learn more on manual reindexing. Once reindexing is done, the reports will feature latest data. Will the Advanced Reports extension process those orders which were placed before the installation?Yes, the Advanced Reports extension will index ALL orders which have been placed in the store.
|
Troubleshooting
| Section | ||||||||
|---|---|---|---|---|---|---|---|---|
I have deleted the product. Will it impact the reports?If the product was deleted, the 'Product Performance' report will erase the SKUs of the product from the order table. It means that configurable products and products with custom options will have their SKUs marked as 'product was deleted'. The deleted products will not impact the report performance or the data generated. I can't see the attribute in the 'Sales by Attributes' report!Make sure you have enabled the 'Use for Promo Rule Conditions' option for the attribute you cannot find in the report. If required, refresh cache and reload the page. Why can I not see some configurable and bundle products in the 'Sales by Attributes' report?It depends on whether you have set a dynamic or fixed price for the corresponding configurable and/or bundle products.
How are profit values calculated in the 'Product Performance' report?Total revenue, cost, profit, and margin are calculated in accordance to the following formulae: Total Revenue (excl. Tax)
Total Cost
Total Profit
Total Margin
|
Uninstalling Advanced Reports
| Section | ||||||||||||||||||||||
|---|---|---|---|---|---|---|---|---|---|---|---|---|---|---|---|---|---|---|---|---|---|---|
|
Need Customization?
.png?version=1&modificationDate=1564137686533&cacheVersion=1&api=v2)
You can always find the latest version of the software, full documentation, demos, screenshots, and reviews on http://aheadworks.com
License agreement: https://aheadworks.com/end-user-license-agreement
Contact Us: https://aheadworks.com/contact
Copyright © 2021 Aheadworks Co. http://www.aheadworks.com
...