| Section | |||||||||||||
|---|---|---|---|---|---|---|---|---|---|---|---|---|---|
|

...
| Command Line Installation | Composer Installation | ||||||||||||||||||||||||||||||||||||||||||||||||||||||||||||||||||||||||||||||||||||||||||||||||||||||||||||||||||||||||||||||||||||||||||||||||||||||||||||||||||||||||||||||||||||||||||||||
|---|---|---|---|---|---|---|---|---|---|---|---|---|---|---|---|---|---|---|---|---|---|---|---|---|---|---|---|---|---|---|---|---|---|---|---|---|---|---|---|---|---|---|---|---|---|---|---|---|---|---|---|---|---|---|---|---|---|---|---|---|---|---|---|---|---|---|---|---|---|---|---|---|---|---|---|---|---|---|---|---|---|---|---|---|---|---|---|---|---|---|---|---|---|---|---|---|---|---|---|---|---|---|---|---|---|---|---|---|---|---|---|---|---|---|---|---|---|---|---|---|---|---|---|---|---|---|---|---|---|---|---|---|---|---|---|---|---|---|---|---|---|---|---|---|---|---|---|---|---|---|---|---|---|---|---|---|---|---|---|---|---|---|---|---|---|---|---|---|---|---|---|---|---|---|---|---|---|---|---|---|---|---|---|---|---|---|---|---|---|---|---|
|
|

Introducing Magento 2 Requisition Lists
| Section |
|---|
Requisition Lists for Magento 2 is an extension to support customer procurement operations on your Magento 2 stores. It enables customers to collect frequently bought products into multiple requisition lists and use them at a later date to place orders. Each item on a requisition list is associated with a catalog entry and has the following attributes: Product Name, Image, SKU, Size, Color (other configurable parameters of a product), Current Product Price. The extensions makes it possible to edit both the requisition lists and the products on the lists. Editing products presumes updating product configuration and quantity, as well as removing products from the list, individually or in bulk. Furthermore, customers are able to move or copy products from list to list. Selected products can be added to Cart in one click. The module can be integrated with Company Accounts and Easy Reorder, the modules that together provide for full-fledged corporate experience in eCommerce procurement. The key-features of the present extension can be shortlisted as follows:
|
Requisition Lists on Backend
| Section |
|---|
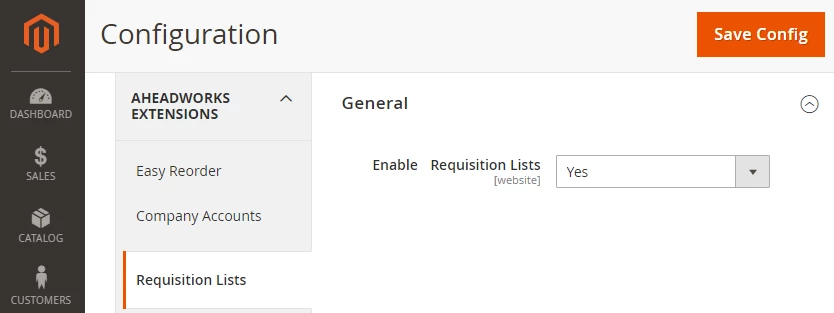
Configuration OptionsTo enable the extension go to Stores > Configuration > Aheadworks Extensions >Requisition Lists.
The Settings page of the extension contains only one configuration parameter - Enable Requisition Lists with two alternative options to choose from: Yes/No. |
Requisition Lists on Frontend
| Section | ||||||||
|---|---|---|---|---|---|---|---|---|
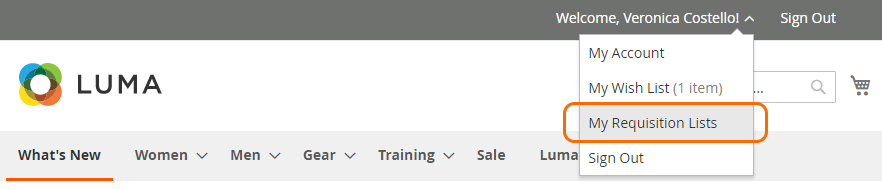
Quick BarCustomers can access the My Requisition Lists page from any page on the store using the Quick Bar. Clicking on the customer name therein will unfold the list of navigation alternatives, where My Requisition Lists is to be chosen. The Customer will be redirected to the My Requisition Lists page in My Account.
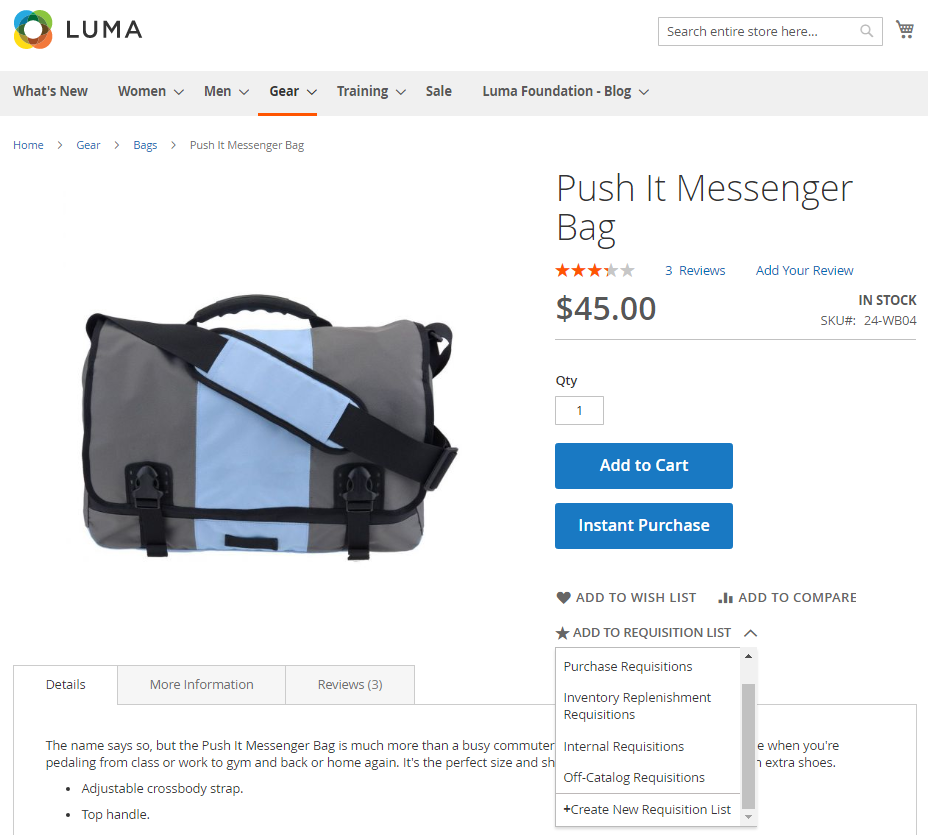
It is also possible to get to My Requisitions Lists from a product page. Adding ProductsWhen on a product page customers make use of the Add to Requisition List option next to the native Magento Add to Wish List and Add to Compare. It is only on a product page that items can be added to a requisition list when browsing the store. (Other options are available in My Account). It is essential that customers first configure the product (if any parameters are given) and indicate its quantity. The latter can later be updated on the Requisition List page in My Account. Leaving the configuration options blank will result in a notification on the error ('This field is required') and will not add the product to the requisition list. Clicking on the Add to Requisition List option will unfold a drop-down of available requisition lists and the Create New Requisition List alternative. To add a product to a requisition list, customers select a requisition list from the Add to Requisition List drop-down on the product page. The product will be added to the chosen list, leaving the Customer on the product page.
If the Customer is logged-out, the Add to Requisition List option will show only the Create New Requisition List alternative. Clicking on it will take the Customer to the Sing-in page. On successful sign-in or registration the Customer will be redirected to the My Requisition Lists page.
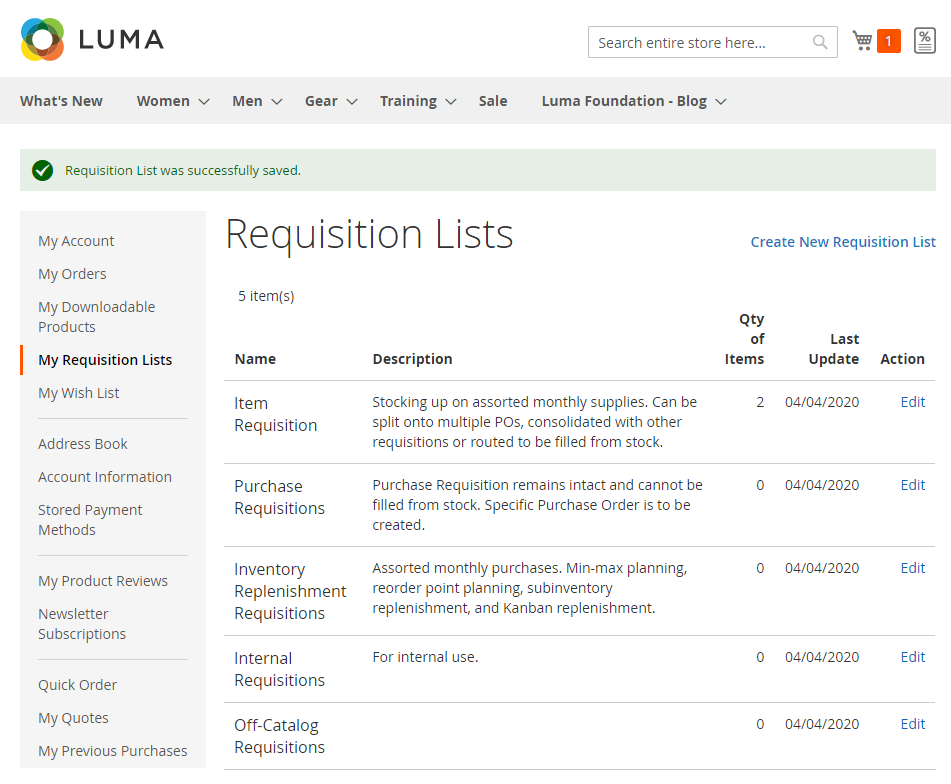
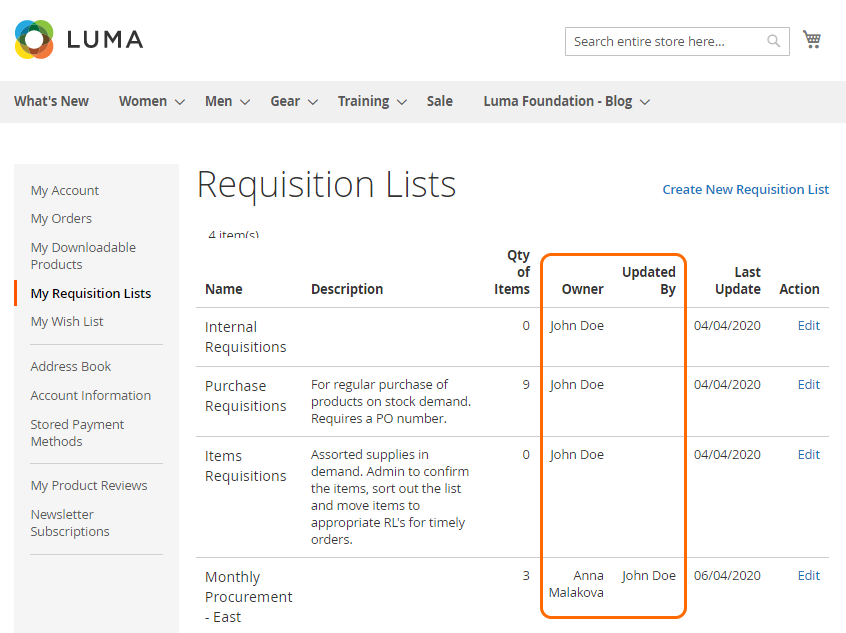
Creating and Monitoring Requisition ListsWhen on the My Requisition Lists page in My Account, customers are able to monitor and browse their requisition lists, as well as to create new ones. The page collects existing requisition lists into a grid of the following columns:
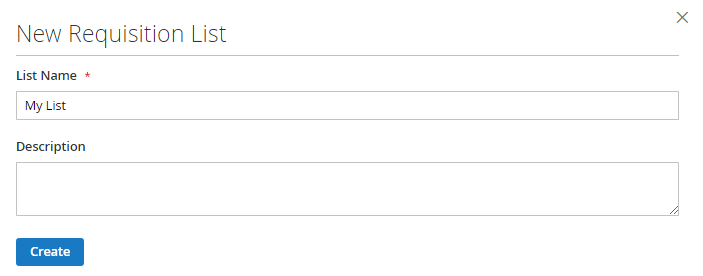
To create a requisition list, click on the Create New Requisition List active link above the grid. The New Requisition List pop-up will emerge. The pop-up will prompt customers to fill-in two fields: List Name (mandatory) and Description (optional and empty by default). On completing the fields, click the Create button in the bottom left corner of the pop-up. The new list will appear on the My Requisition Lists grid, and a notification ("Requisition List was successfully saved") will appear on the top of the page.
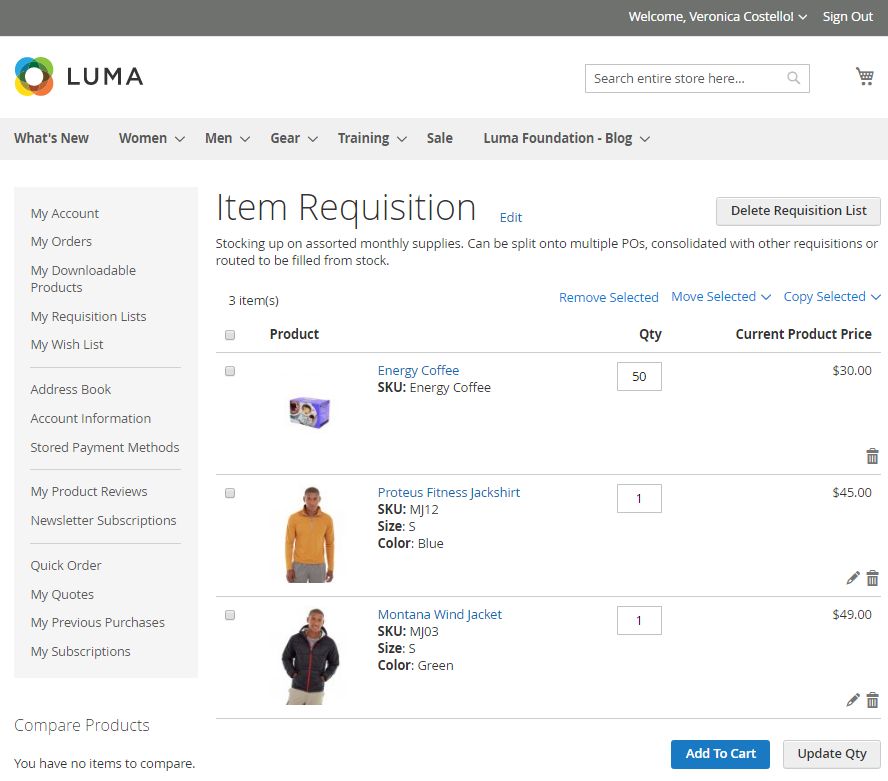
Editing Requisition ListsTo reach to the Requisition List page, click on the Edit active link in the corresponding cell of the Actions column of the My Requisition Lists grid. The Requisition List page will feature the following:
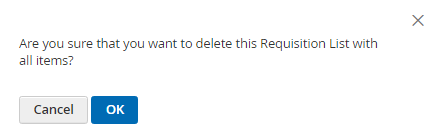
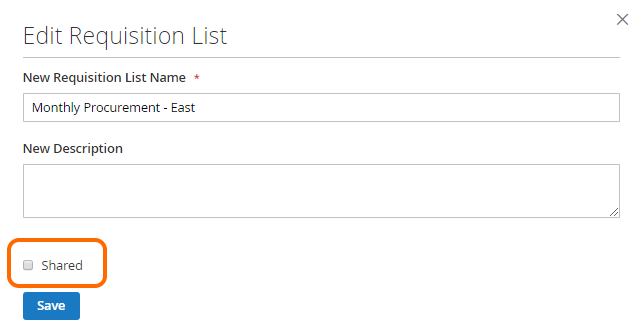
To edit the list, click on the edit active link on the right of the name of the list. The Edit Requisition List pop-up will emerge, similar to the Create Requisition List one but featuring relevant data on the chosen requisition list. On completing the update, click the Save button at the bottom of the pop-up. To delete the list, click on the Delete Requisition list button on the right of the Edit active link. A pop-up will appear for the Customer to confirm his/her action.
On clicking the OK button, the requisition list will be removed from the grid and will no longer be available on the storefront too. Currently, it is not possible to recover deleted requisition lists. The grid of products on a requisition list contains the following columns:
Customers can do the following operations with the items selected on a requisition list:
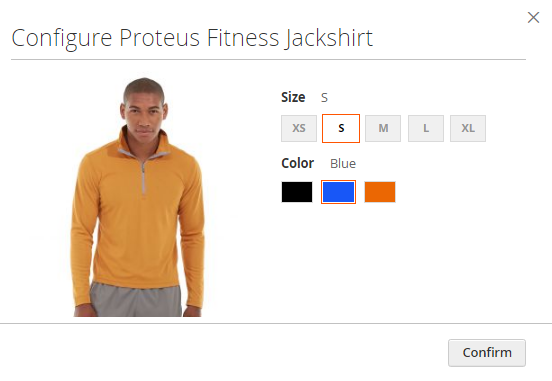
To update the quantity of a product on a requisition list, customers alter the whole numeric value of the Qty text-box and click on the Update Qty button below the grid to confirm the change. Only on clicking the Update Qty button will the changes take place. A success message will appear: “{Number} items have been updated in {Name of current Req. List} list”. To delete an item from the requisition list, click on the Bucket icon below the price of the product. To change product configuration or product options, click on the Pencil icon next to the Bucket icon. A popup will appear prompting customers to select product configuration/options. On completing the configuration, click on the Confirm button at the bottom of the pop-up.
The pop-up will close, and the product configuration will get updated on the requisition list. A success message will appear: “{Name of item} item has been successfully updated in {Name of current Req. List} list”.
To add items to Cart, select items on the requisition list and click on the Add to Cart button. The items will be copied to Cart, the customer will be redirected to Cart. A success message will appear: "{Number of items copied} of {Number of items selected} item(s) successfully added to Cart". The requisition list will remain integral, no items will be removed.
IntegrationsCompany AccountsInstall the Magento 2 Company Accounts module to enable corporate customers to share requisition lists between company sub-accounts, and see who updated the lists last. When Company Accounts is installed two columns are added to the My Requisition Lists grid:
The Company Account Admin has absolute rights over the requisition lists created by company members. The Admin can edit the lists of the members like his/her own ones. It means that the Admin can change the quantity of the products, product options, delete and add new products; change the name of the list; share of hide the list for the members. To share a requisition list between the company members, the Customer proceeds to the Edit Requisition List pop-up and ticks the Shared checkbox. The Company Admin will have access to all requisition lists, whether they were shared or not.
When the Company Admin is browsing the store, the Add to Requisition List option on a product page will feature all requisition lists created within the company ( both those of the Admin and company members). The requisition lists owned by the Admin will be at the the top of the Add to Requisition List drop-down. Company sub-accounts will see the lists they own, as well as the lists that were shared among the company. Easy ReorderInstall the Magento 2 Easy Reorder module to let customers add products to requisition lists from the My Previous Purchases grid. When Easy Reorder is installed, the My Previous Purchases page will display the Add to Requisition List active link next to the Add All Selected to Cart button. Clicking on the link will open a drop-down to feature Customer's requisition lists. Next, clicking on a requisition list will add the items selected to the list. 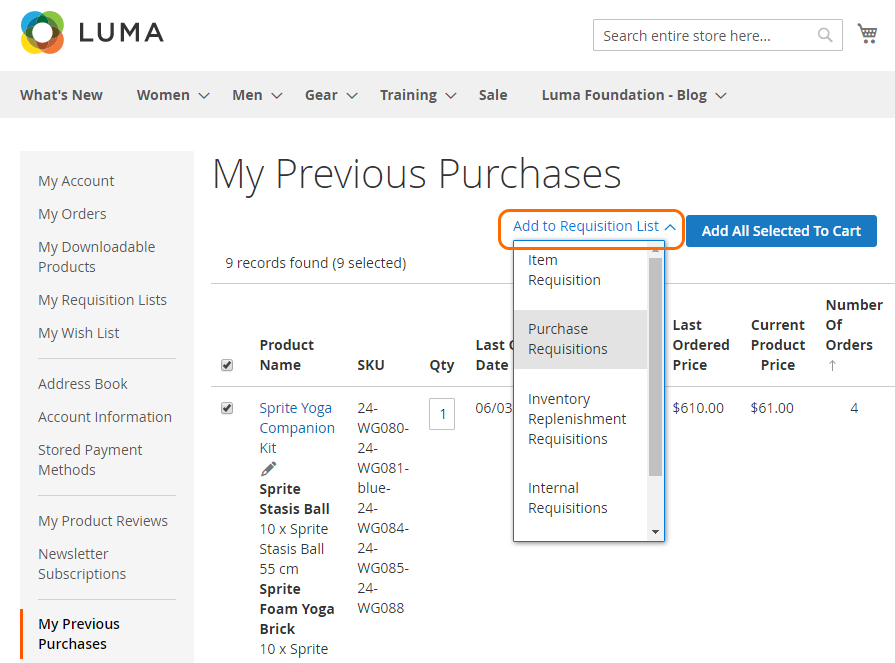 If no items are selected and the Customer clicks on the Add to Requisition List active link, a popup with the title “Attention” and text “You haven’t selected any items” will appear. Clicking the OK button at the bottom of the pop-up will close the pop-up.
|
Uninstalling Requisition Lists
| Section | ||||||||||||||||||||||
|---|---|---|---|---|---|---|---|---|---|---|---|---|---|---|---|---|---|---|---|---|---|---|
|
Need Customization?
.png?version=1&modificationDate=1586167444043&cacheVersion=1&api=v2)
You can always find the latest version of the software, full documentation, demos, screenshots, and reviews on http://aheadworks.com
License agreement: https://aheadworks.com/end-user-license-agreement
Contact Us: https://aheadworks.com/contact
Copyright © 2021 Aheadworks Co. http://www.aheadworks.com
...