| Section | |||||||||||||
|---|---|---|---|---|---|---|---|---|---|---|---|---|---|
|

...
| Command Line Installation | Composer Installation | ||||||||||||||||||||||||||||||||||||||||||||||||||||||||||||||||||||||||||||||||||||||||||||||||||||||||||||||||||||||||||||||||||||||||||||||||||||||||||||||||||||||||||||||||||||||||||||||||
|---|---|---|---|---|---|---|---|---|---|---|---|---|---|---|---|---|---|---|---|---|---|---|---|---|---|---|---|---|---|---|---|---|---|---|---|---|---|---|---|---|---|---|---|---|---|---|---|---|---|---|---|---|---|---|---|---|---|---|---|---|---|---|---|---|---|---|---|---|---|---|---|---|---|---|---|---|---|---|---|---|---|---|---|---|---|---|---|---|---|---|---|---|---|---|---|---|---|---|---|---|---|---|---|---|---|---|---|---|---|---|---|---|---|---|---|---|---|---|---|---|---|---|---|---|---|---|---|---|---|---|---|---|---|---|---|---|---|---|---|---|---|---|---|---|---|---|---|---|---|---|---|---|---|---|---|---|---|---|---|---|---|---|---|---|---|---|---|---|---|---|---|---|---|---|---|---|---|---|---|---|---|---|---|---|---|---|---|---|---|---|---|---|---|
|
|

Getting Around
| Section | |||||
|---|---|---|---|---|---|
Extension LogicThe Order Success Page extension adds its own blocks to the native Magento Order Success Page. The blocks can be divided into two types: Standard (see General Settings section) and Rule-based (see Rule section). Standard blocks are always displayed for all customers, while rule-based are shown only if the order complies rule settings.
Tracking codesBecause the extension uses the native page as a base, all tracking codes you may have on that page should continue working as they did before the installation. LayoutThe extension offers 4 positions for the notification blocks:
Some blocks like “Order Summary” and “Cross-Sell” can only be set to Page Top or Page Bottom positions, because of their size. By default, the blocks are placed the following way:
As you can see, if you would like to use a single-column layout, you can use only Page Top and Page Bottom positions. To set an order of the Blocks, use the Priority field. This setting respects the layout position, so it is very easy to set the right order in every position of the page. |
Backend Configuration
...
| Section | ||||||||||
|---|---|---|---|---|---|---|---|---|---|---|
General Settings
Order Summary
Contacts
Customer Registration
Newsletter Subscription
Static Block
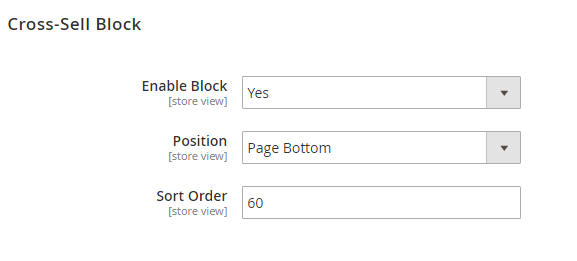
Cross-Sell Block
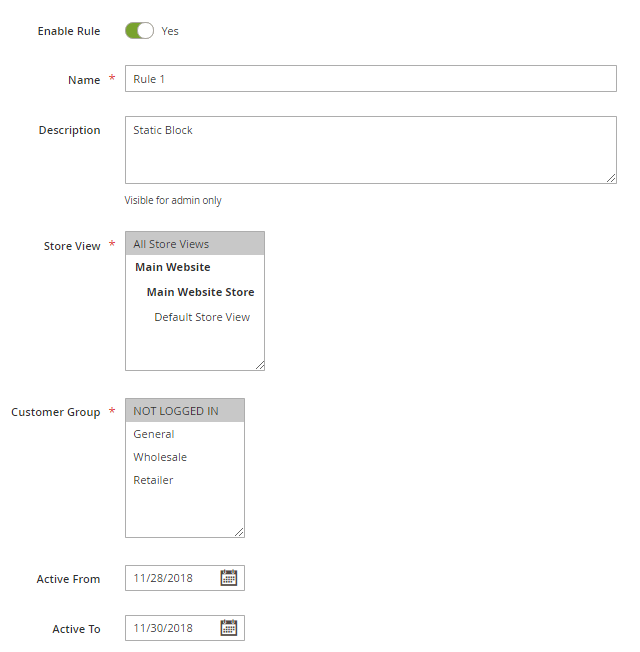
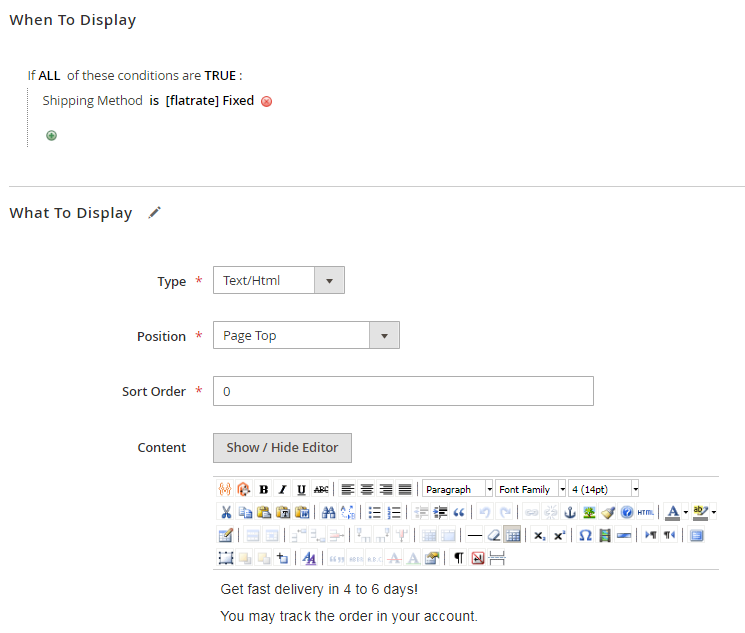
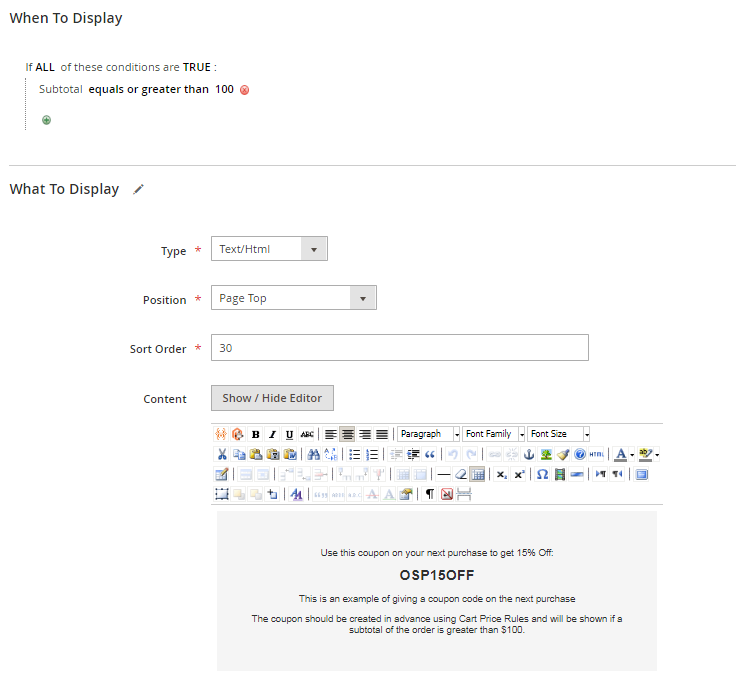
RulesGeneral InformationFind the Rules section following the pass Content-> Order Success Page by Aheadworks -> Rules. Here you can see a standard grid with the list of the rules. The rules can be filtered and enabled/disabled/deleted in bulk.
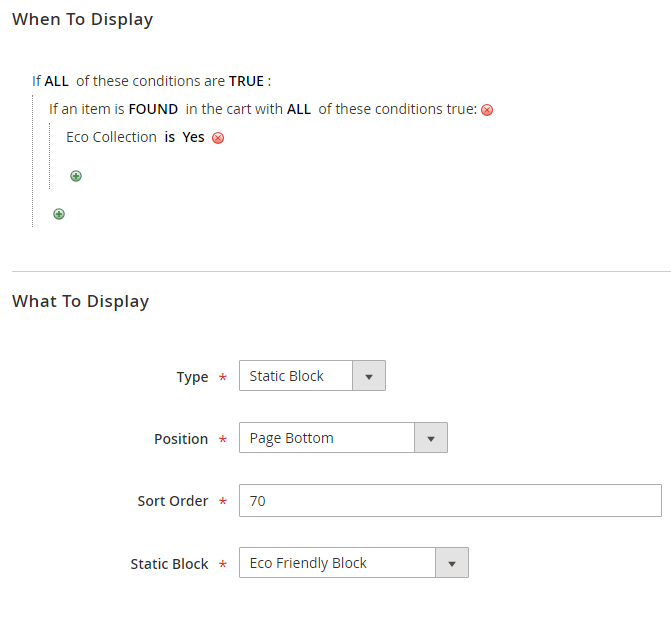
Rule setup examplesEach rule can display one of the following block types:
a) If you want to add a static block
|
.png?version=1&modificationDate=1555759347328&cacheVersion=1&api=v2&width=654)
.png?version=2&modificationDate=1555759405585&cacheVersion=1&api=v2&width=605)
.png?version=1&modificationDate=1555759458821&cacheVersion=1&api=v2&width=577)
.png?version=1&modificationDate=1555759542186&cacheVersion=1&api=v2&width=575)
.png?version=1&modificationDate=1555759578374&cacheVersion=1&api=v2&width=585)
.png?version=1&modificationDate=1555759632572&cacheVersion=1&api=v2&width=559)
Uninstalling Order Success Page
...
Need Customization?
.png?version=1&modificationDate=1564161261686&cacheVersion=1&api=v2)
You can always find the latest version of the software, full documentation, demos, screenshots, and reviews on http://aheadworks.com
License agreement: https://aheadworks.com/end-user-license-agreement
Contact Us: https://aheadworks.com/contact
Copyright © 2021 Aheadworks Co. http://www.aheadworks.com
...