| Section | |||||||||||||
|---|---|---|---|---|---|---|---|---|---|---|---|---|---|
|

...
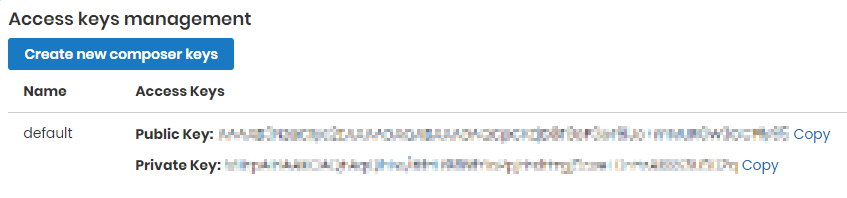
| Command Line Installation | Composer Installation | ||||||||||||||||||||||||||||||||||||||||||||||||||||||||||||||||||||||||||||||||||||||||||||||||||||||||||||||||||||||||||||||||||||||||||||||||||||||||||||||||||||||||||||||||||||||||||||||||
|---|---|---|---|---|---|---|---|---|---|---|---|---|---|---|---|---|---|---|---|---|---|---|---|---|---|---|---|---|---|---|---|---|---|---|---|---|---|---|---|---|---|---|---|---|---|---|---|---|---|---|---|---|---|---|---|---|---|---|---|---|---|---|---|---|---|---|---|---|---|---|---|---|---|---|---|---|---|---|---|---|---|---|---|---|---|---|---|---|---|---|---|---|---|---|---|---|---|---|---|---|---|---|---|---|---|---|---|---|---|---|---|---|---|---|---|---|---|---|---|---|---|---|---|---|---|---|---|---|---|---|---|---|---|---|---|---|---|---|---|---|---|---|---|---|---|---|---|---|---|---|---|---|---|---|---|---|---|---|---|---|---|---|---|---|---|---|---|---|---|---|---|---|---|---|---|---|---|---|---|---|---|---|---|---|---|---|---|---|---|---|---|---|---|
|
|
.png?version=1&modificationDate=1613637668044&cacheVersion=1&api=v2&width=450)
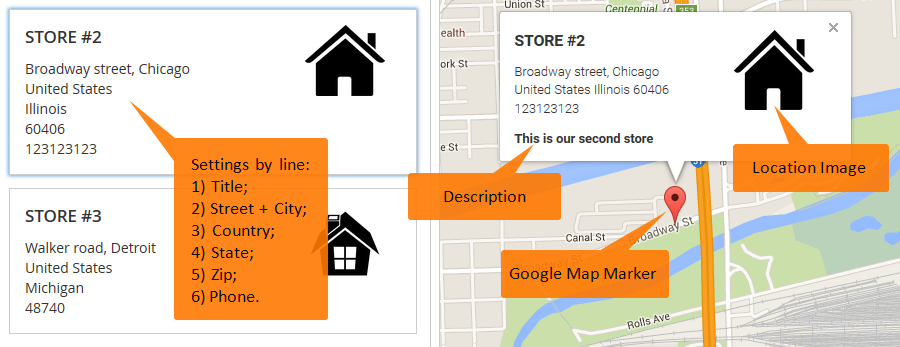
Adding the store location
| Section | |||||||
|---|---|---|---|---|---|---|---|
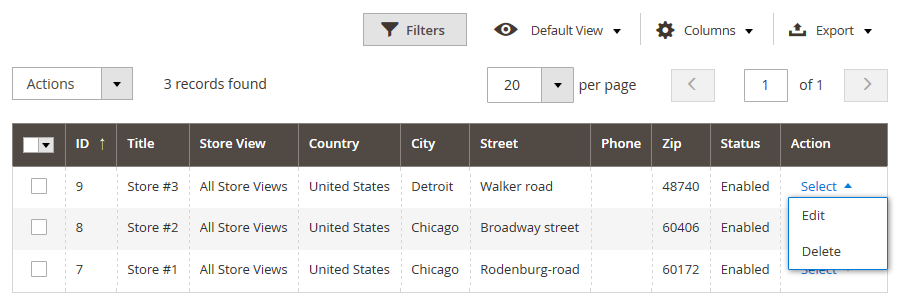
Store Locator extension comes ready for work right after the installation. The first thing you want to do is to add the location of your store to the map. To do this, navigate to Content > Store Locator by aheadWorks:
This screen is a management center of all your store locations. Whether you want to add a new location, edit previously created one, or find a particular location by any attribute, - this is the place you are looking for. To add new store location click
That's it, you have just added your first store location. |


Adjusting Store Locator settings
| Section | |||||||||||
|---|---|---|---|---|---|---|---|---|---|---|---|
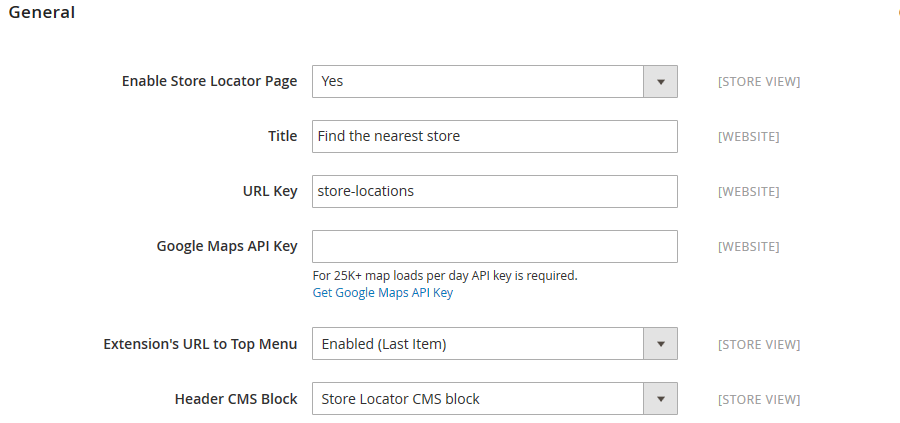
You have added the location of a store and definitely want to look through it. It is now high time to proceed to the Store Locator settings screen to learn how to do it.
Stores > Configuration > aheadWorks extensions > Store Locator General settingsThe extension is enabled by default after the installation, however, the Extension's URL to Top Menu option that brings the Store Locator section to the frontend navigation menu is disabled. Let's go through the settings available and what they do:
Once you have applied all the settings changes and decided on where at the Top Menu you want the Extension's URL displayed you may want to proceed to Search and SEO settings:
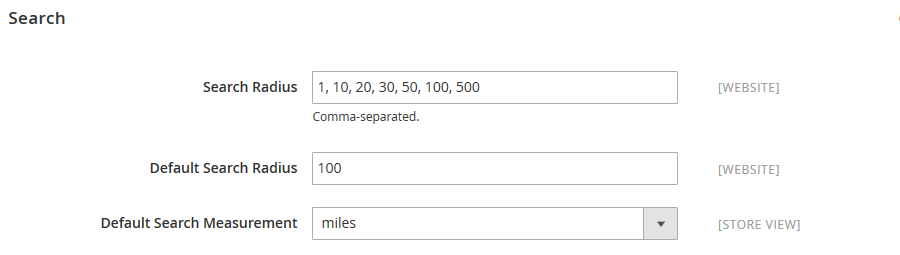
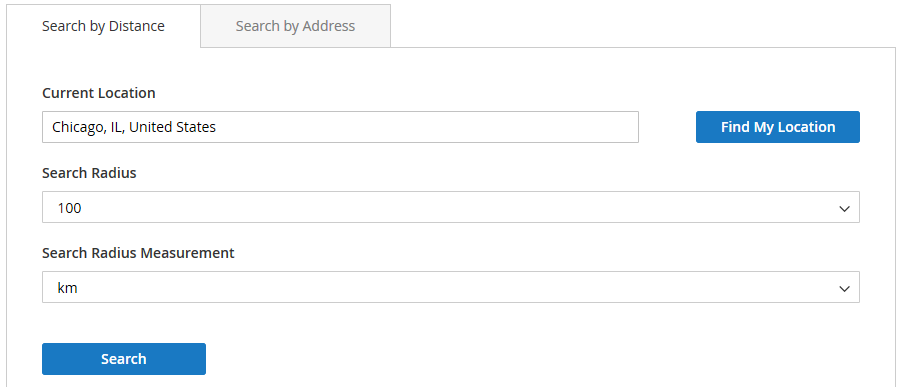
Search and SEO settingsSearch settings let you enhance customer's search experience:
SEO settings let you type in the Meta Keywords and Meta Description of the Store Locator page. Once you are done with Search and SEO settings click Congratulations! You have successfully set up and configured Store Location extension. Now you may want to add more store locations. |


.png?version=1&modificationDate=1555769387256&cacheVersion=1&api=v2&width=68)
Importing Locations via CSV
| Section | ||
|---|---|---|
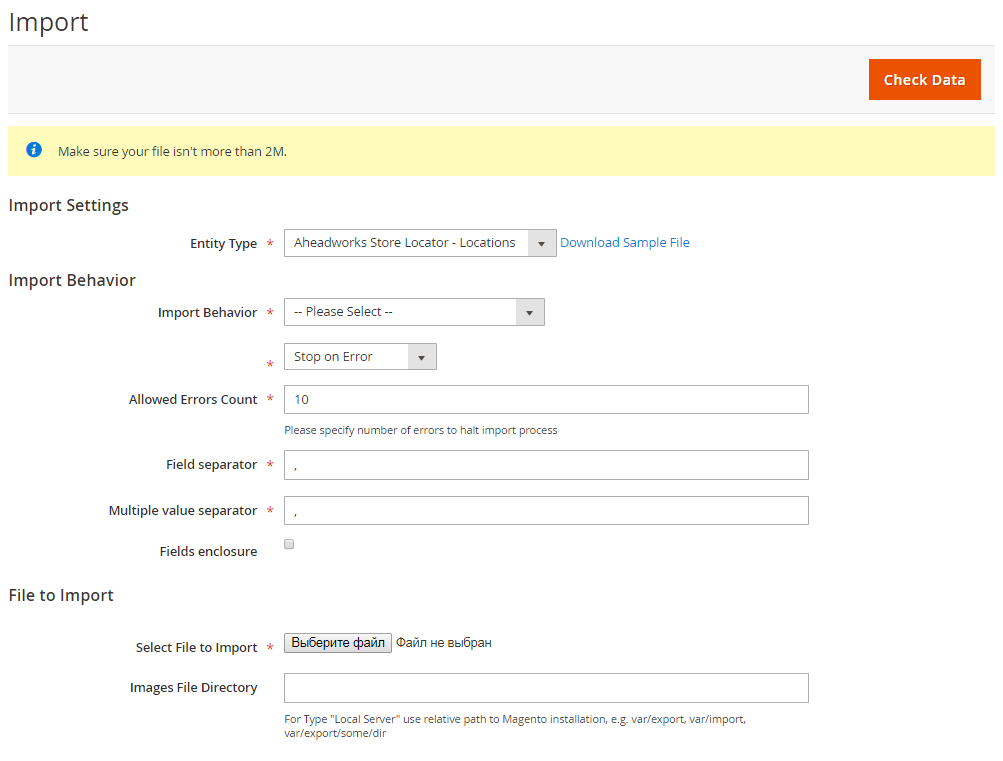
In case if you want to add multiple store locations at once, you can take advantage of the provided import functionality. This functionality is integrated into the native Magento Data Import section located at: System > Data Transfer > Import. The Entity Type section contains the Aheadworks Store Locator - Locations option, which, if selected, enables an import configuration form with two configuration blocks, Import Behavior and File to Import.
Import BehaviorThe Import Behavior set contains the following options:
File to ImportThe File to Import configuration section contains the following options:
|
...
Need Customization?
.png?version=1&modificationDate=1564162397872&cacheVersion=1&api=v2)
You can always find the latest version of the software, full documentation, demos, screenshots, and reviews on http://aheadworks.com
License agreement: https://aheadworks.com/end-user-license-agreement
Contact Us: https://aheadworks.com/contact
Copyright © 2021 Aheadworks Co. http://www.aheadworks.com
...