| Section | |||||||||||||
|---|---|---|---|---|---|---|---|---|---|---|---|---|---|
|
...
| Section | |||||||||||||||||||||||||||||||||||||||||||||||||||||||||||||||||||||||||||||||||||||||||||||||||||||||||||||||||||||||||||||||||||||||||||||
|---|---|---|---|---|---|---|---|---|---|---|---|---|---|---|---|---|---|---|---|---|---|---|---|---|---|---|---|---|---|---|---|---|---|---|---|---|---|---|---|---|---|---|---|---|---|---|---|---|---|---|---|---|---|---|---|---|---|---|---|---|---|---|---|---|---|---|---|---|---|---|---|---|---|---|---|---|---|---|---|---|---|---|---|---|---|---|---|---|---|---|---|---|---|---|---|---|---|---|---|---|---|---|---|---|---|---|---|---|---|---|---|---|---|---|---|---|---|---|---|---|---|---|---|---|---|---|---|---|---|---|---|---|---|---|---|---|---|---|---|---|---|
|

.png?version=1&modificationDate=1613404972811&cacheVersion=1&api=v2&width=450)

Updating Customer Segmentation for Magento 2
| Section | ||||||||||||||||||||||||||||||||||
|---|---|---|---|---|---|---|---|---|---|---|---|---|---|---|---|---|---|---|---|---|---|---|---|---|---|---|---|---|---|---|---|---|---|---|
|
Introducing Customer Segmentation for Magento 2
| Section |
|---|
IntroductionThe Customer Segmentation extension for Magento 2 presents a tool to draw various segments of customers according to a number of customized rules and conditions. With the extension you are able to:
What's New?Customer Segmentation for Magento 2 as of version 1.2.0 supports integration with Company Accounts for Magento 2. |
Customizing segments
| Section | |||||||||||||||||||||
|---|---|---|---|---|---|---|---|---|---|---|---|---|---|---|---|---|---|---|---|---|---|
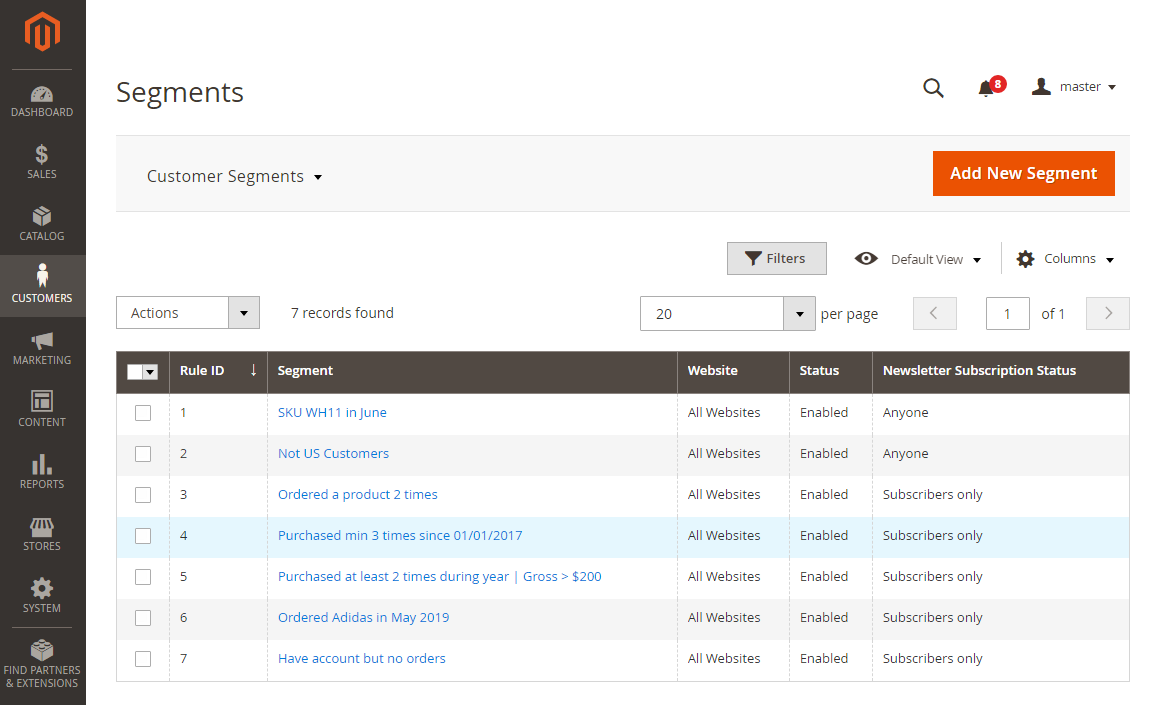
To start work with the Magento 2 Customer Segmentation go to Customers> Customer Segmentation by Aheadworks > Customer Segments. Customer Segments PageThis is where you may view, edit the segments as well as add new ones. The segments are allocated into a table with four columns: Rule ID, Segment, Website, Status and Newsletter Subscription Status, which represent some most important details of segments settings. The table is easily customizable and searchable with the 'Columns', 'Default View' and 'Filters' active elements on the top right of the page.
You may enable, disable or delete available segments individually or in bulk. Tick the boxes next to the chosen segments on the left of the table, click the 'Actions' folding list and opt for an operation. To edit a segment click the active link of the segment name, to add a new segment click the 'Add New Segment' button on the top right of the page. These operations will take you to the Edit/New Segment page.
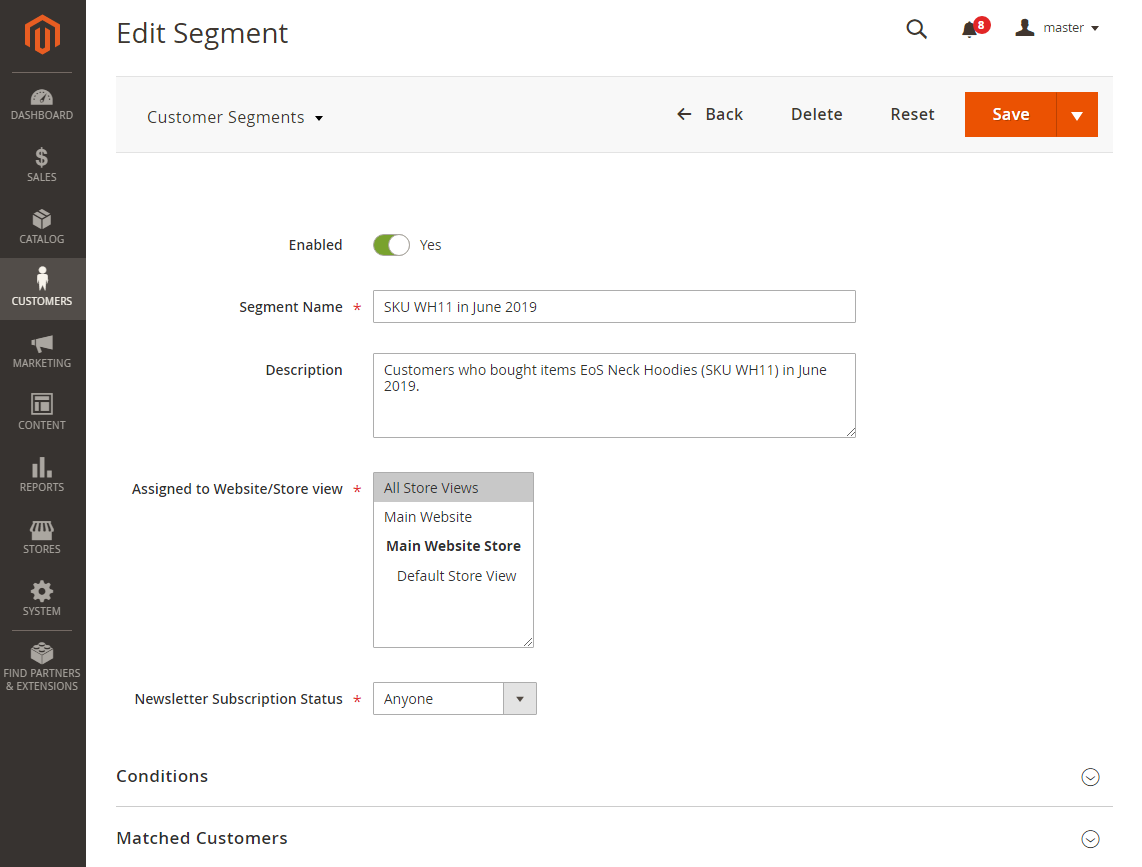
New Segment and Edit Segment PagesThe New Segment and Edit Segment pages look identical, the name suggests the operation you are to do with the segment. This is where you may alter or add all the details of the segment, define rules for segmentation, and look up for matched customers. The image below reflects some basic details you are suggested to provide for each segment. They are as follows:
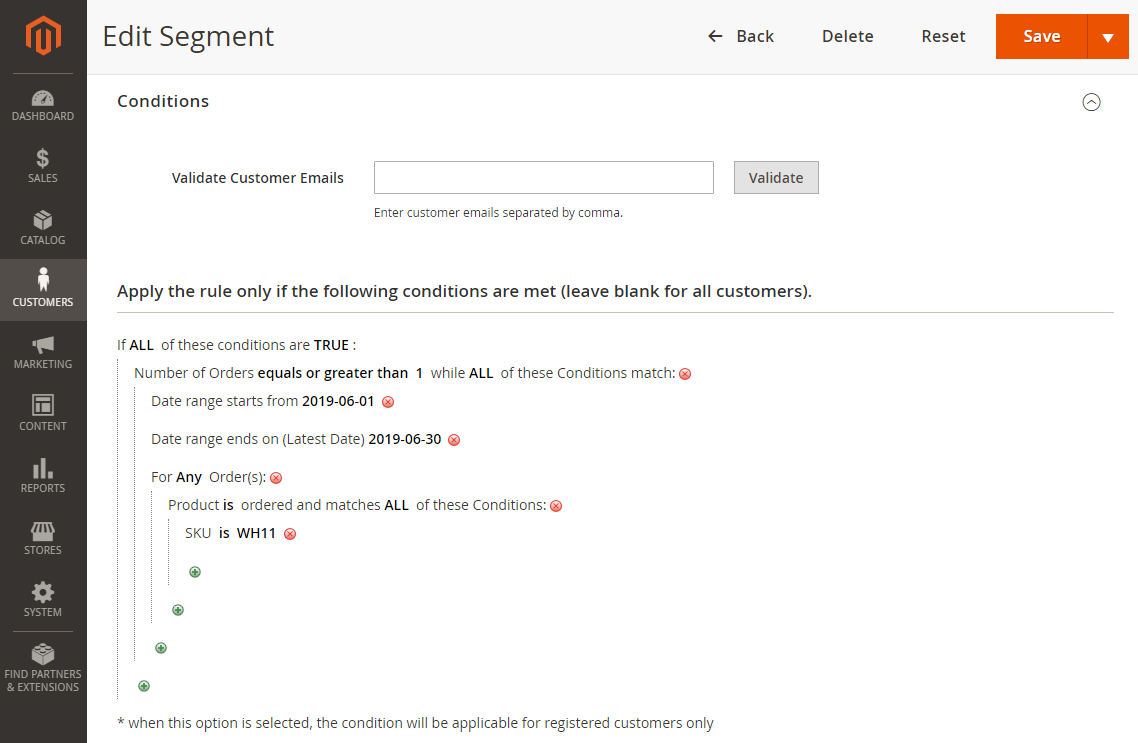
Prior settings of the segment sorted, you may now proceed to the Conditions block of the segment. Conditioning the segmentsThe Conditions block of the Edit/New Segment page allows:
To add conditions for segmentation click
When the rule is set, proceed to one of the following:
Run the following commands for reindexing:
To delete a condition click
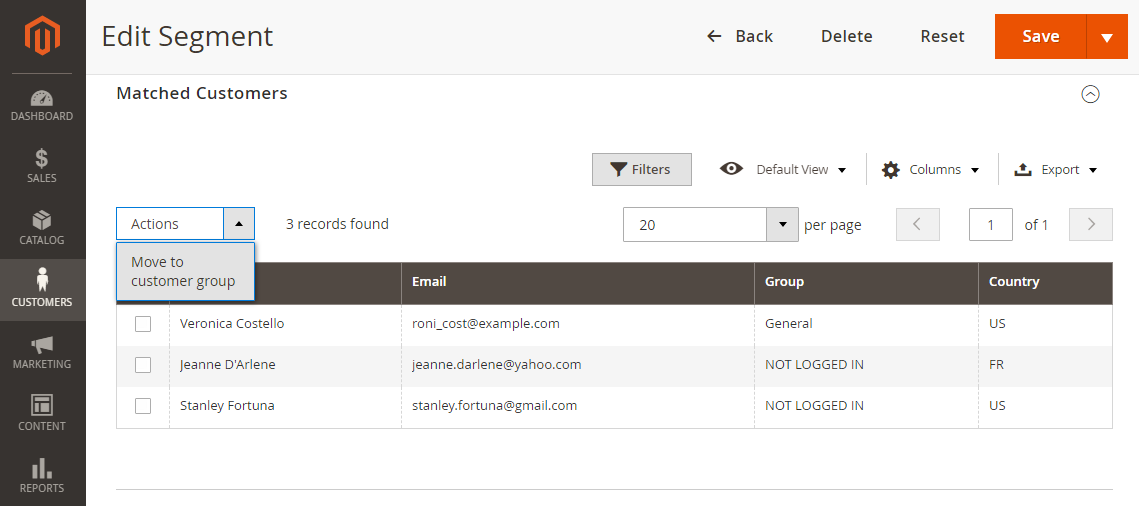
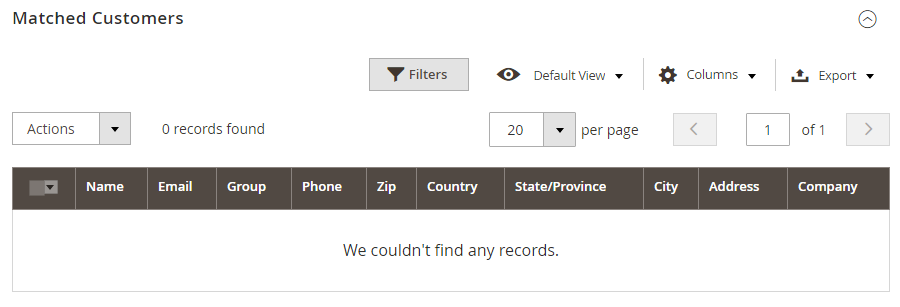
Once the rule is set, saved and reindexed, you will be able to check the customers who match the segmentation, move them to groups or export to CSV. Checking segmented customersAfter reindexing is done, scroll down the Edit/New Segment page to the 'Matched Customers' block to check the customers who match the segmentation. The list comes as a table with the following columns, the names of which speak for their content: Name, Email, Group, Country, Phone, Zip, State, City and Address. You may customize the view of the table the 'Columns', 'Default View' and 'Filters' active elements on the top right of the page. To export the segment click 'Export' To move the segment to a group select the customer entries, click 'Actions' and then 'Move to customer group'. A list of groups available will pop-up, where you will be able to finilize the operation.
|


Integrating Customer Segmentation
| Section | ||||||||||||
|---|---|---|---|---|---|---|---|---|---|---|---|---|
Logic of disabled segmentsIntergration with Customer Segmentation presumes that the cooperating module will either receive a list of segments or feature the segment criteria and segments in rule conditioning. All segments, enabled and disabled, will be shown in the list/rule. The disabled segments will have a corresponding indication of thereof. If a disabled segment is selected in a rule, the rule will not trigger. If several segments are selected and some of them are enabled, the rule will be validated only against the enabled segments.
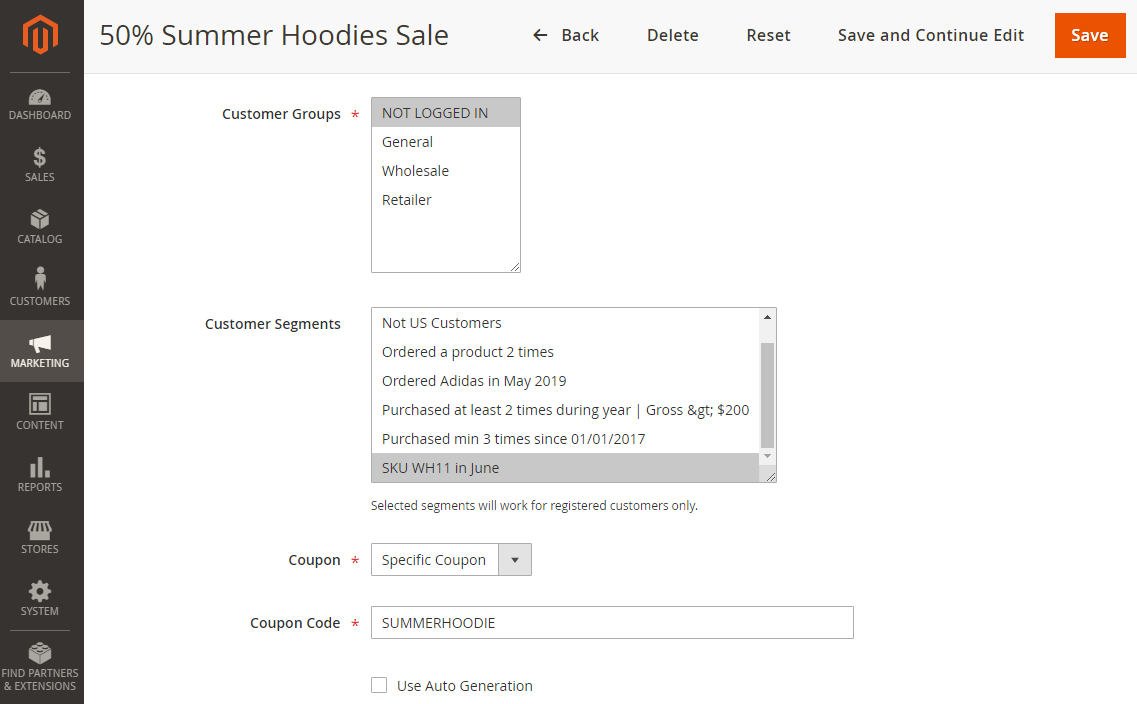
Logic of multiple websitesMagento 2 allows setting up multiple websites. The Multiple Website feature means that you can run more than one website from the similar Magento installation. You manage multiple websites from a single domain dashboard. If a segment is selected from Website2, for a rule from Website1, that rule will not be applied. Make sure the segments come from the same website as the rules. Be careful removing the websites (stores, store views). When a website is removed, the link between the segment and the site is removed too. Consequently, the segment can be assigned to none of the available websites. Manual segment updating by a store admin may then be required. More on Magento 2 Multiple Websites. Integration with native Magento 2 modulesCustomer Segmentation for Magento 2 allows for a few useful integrations, which help your promotional campaigns be more targeted and therefore effective. Once installed the module will integrate itself into the Cart Price Rules and Native Magento Newsletter. Cart Price Rules IntegrationTo fine-tune the coupons as well as some other discounts which are to be applied at check-out or in cart with regard to a particular customer segment go to Marketing > Cart Price Rules. Pick up a rule from the list or start a new one. Complete the essentials and move down to the Customer Segments. Here you will find a list of segments available for selection.
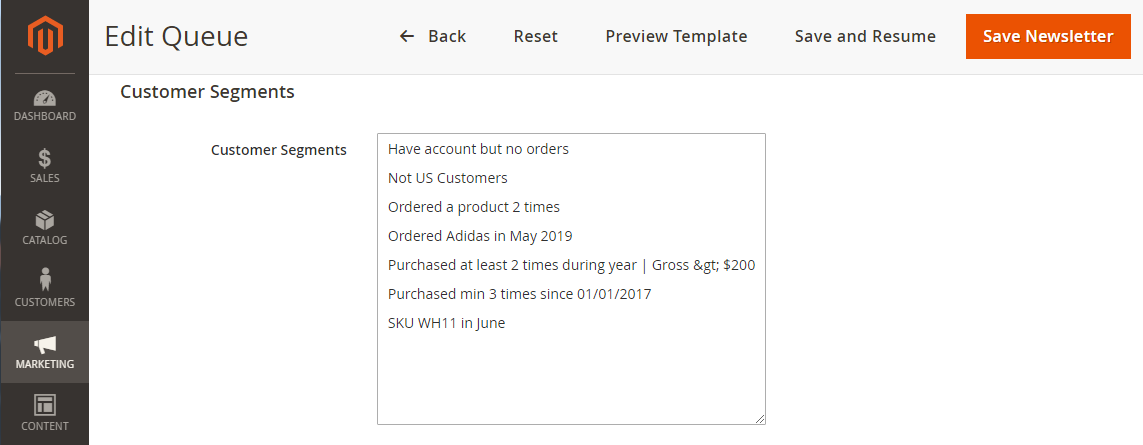
More on native Magento cart price rules. Native Magento Newsletter IntegrationTo personalize you email newsletters you may resort to a Customer Segments block too. This time you will have to proceed to Marketing > Newsletter Queue. Click a queue for editing and scroll the list of settings down to the Customer Segments block. Finalize the queue, save the newsletter, and it will only be delivered to those registered customers who fall into the chosen segment.
More on native Magento newsletters. Integration with Aheadworks modulesContent Management modulesCustomer Segmentation for Magento 2 can noticeably enhance the functionality of a few Aheadworks modules, basically meant to display all sorts of content, namely: Customer Segmentation for Magento 2 allows specifying the display of content to customer segments.
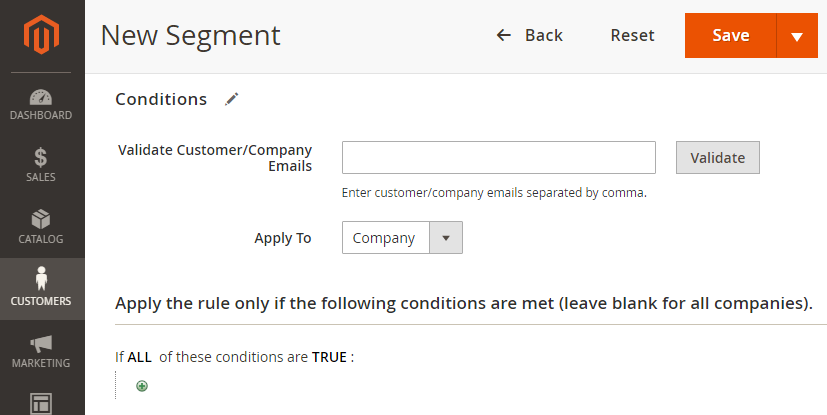
Company AccountsIntegration with Company Accounts for Magento 2 allows Customer Segmentation for Magento 2 to specify companies into segments, which can then be used to fine-tune various marketing campaigns. When the Company Accounts for Magento 2 module is enabled on the store, the Create/Edit Segment page has the following updates:
If a Company matches the rule, all members of the Company get into the given segment. A note to developerTo get the array of segment ids assigned to a customer, a developer is to use an instance of the class:
see the following constant for reference
|
Customer Segmentation Use Cases
| Section | ||
|---|---|---|
Below you may find some sample rules for segmentation of customers alonside the explanations for the use cases. 1. List of clients who ordered a specific product at least 2 times
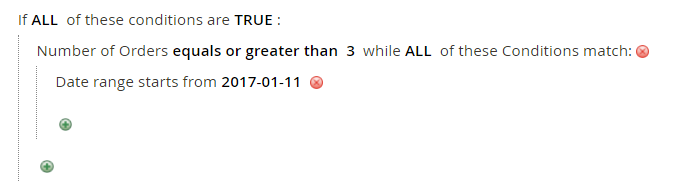
“Number of Orders equals or greater than 2” filters out the customers who have only 1 order which contains 2 items of the same SKU. If this is not essential, you can set that value to 1. 2. List of clients who made a purchase at least 3 times since 11/01/2017
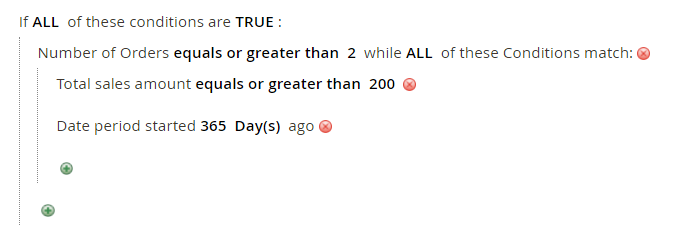
3. List of clients who made a purchase at least two times during the past year for a global amount equals or greater than 200€
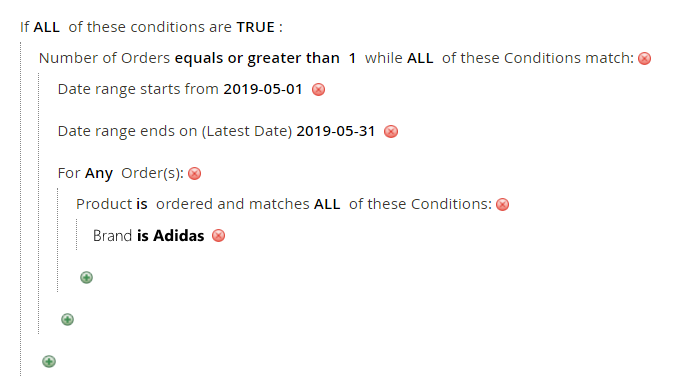
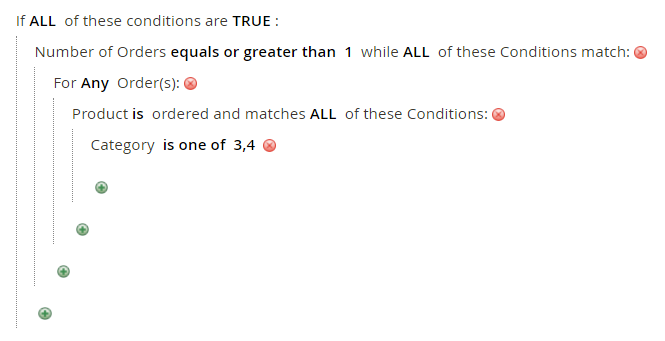
4. List of clients who ordered products of a specific brand in May 2019
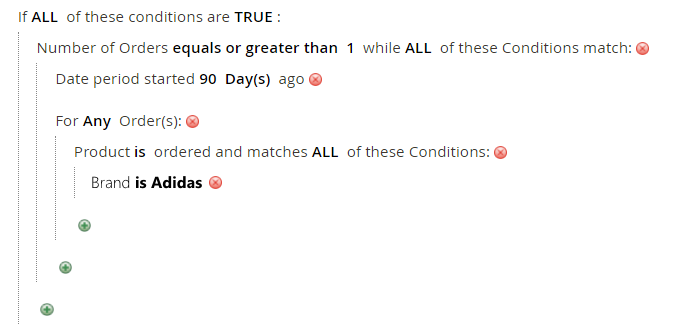
5. List of clients who ordered products of a specific brand in the last 3 months
Same idea as in the previous example with the only difference: Date From/To is replaced with the Date Period.
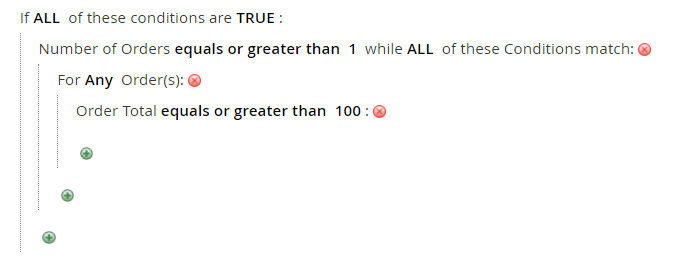
7. List of clients who has the order(s) with a total of 100€ or more
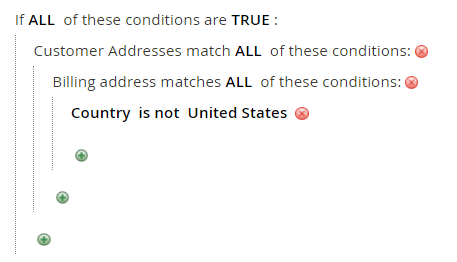
8. List of clients whose billing address is not in USA
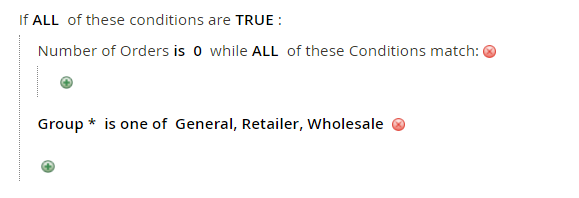
9. List of clients who have an account but did not order
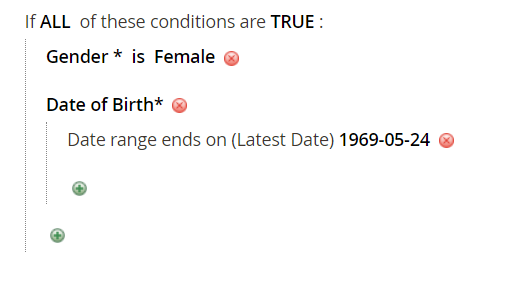
In this example, all customer groups were selected. 10. List of female clients older than 50 years old
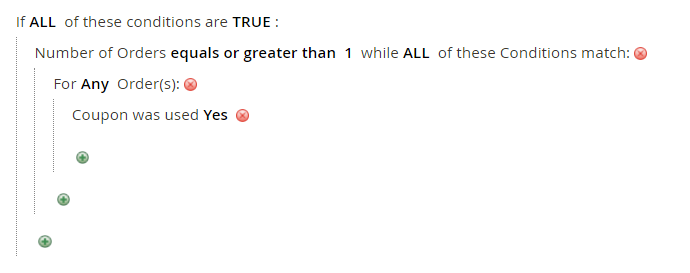
11. List of clients who used a promotion code at least once
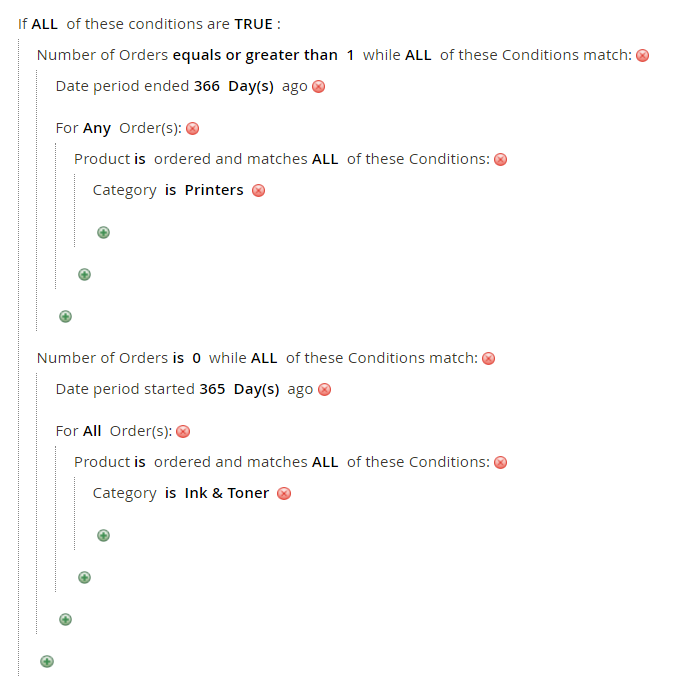
12. List of clients who bought a printer more than a year ago, but didn’t order ink or toner for the last year
|

Uninstalling Customer Segmentation
| Section | ||||||||||||||||||||||
|---|---|---|---|---|---|---|---|---|---|---|---|---|---|---|---|---|---|---|---|---|---|---|
|
| Section |
|---|
Need Customization?
|
.png?version=1&modificationDate=1564162075293&cacheVersion=1&api=v2)
You can always find the latest version of the software, full documentation, demos, screenshots, and reviews on http://ecommerce.aheadworks.com
License agreement: https://ecommerce.aheadworks.com/end-user-license-agreement/
Contact Us: http://ecommerce.aheadworks.com/contacts/
Copyright © 2020 Aheadworks Co. http://www.aheadworks.com
...